Zendesk
Send contact and ticket data to Regal using Zendesk Webhooks & Business Rule Triggers
Sending data from Zendesk to Regal
Regal relies on the Zendesk Webhook Action & Business Rule Triggers to send data to Regal. You can refer to Zendesk developer documentation for additional information and examples.
You need to be a Zendesk Organization Admin in order to set up the below integration.
1) Create New Zendesk Webhook
Navigate to Zendesk Admin Portal & Select "Webhooks", under the "Apps and integrations" section on the left hand bar
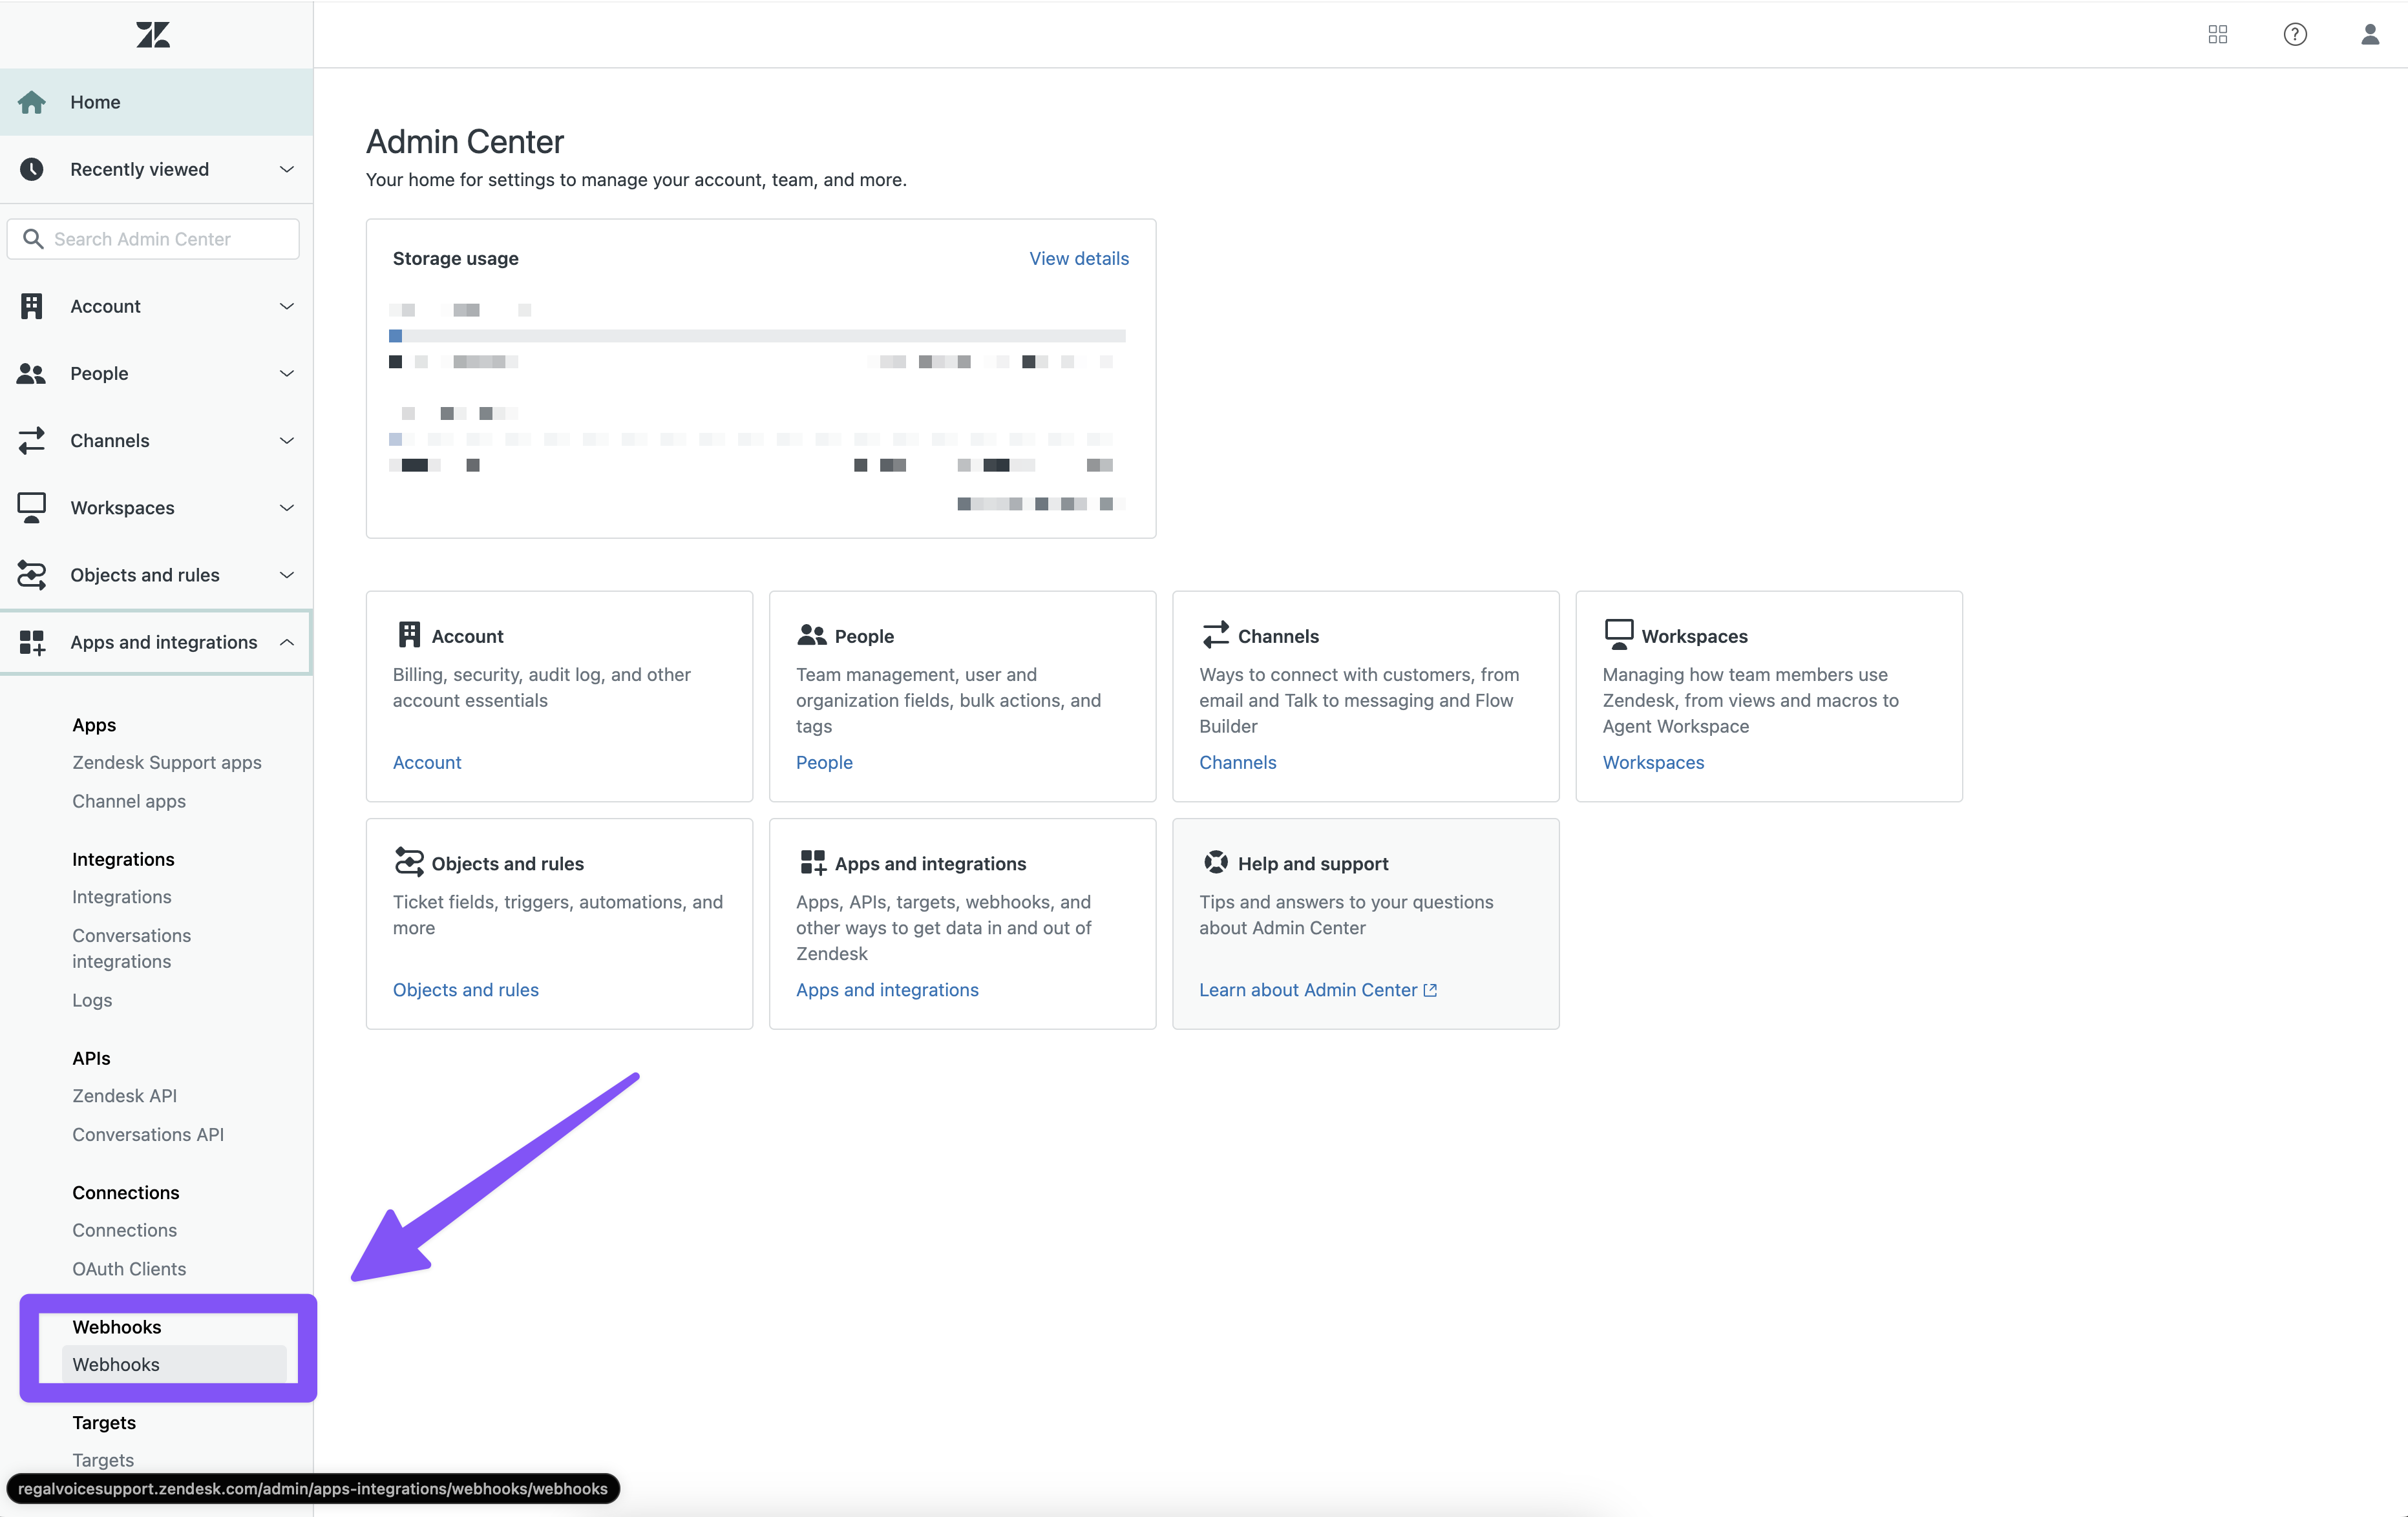
Click "Create Webhook" in the top right

In the Create Webhook Page, under step 1 "Select a way to connect" select "Trigger or automation"
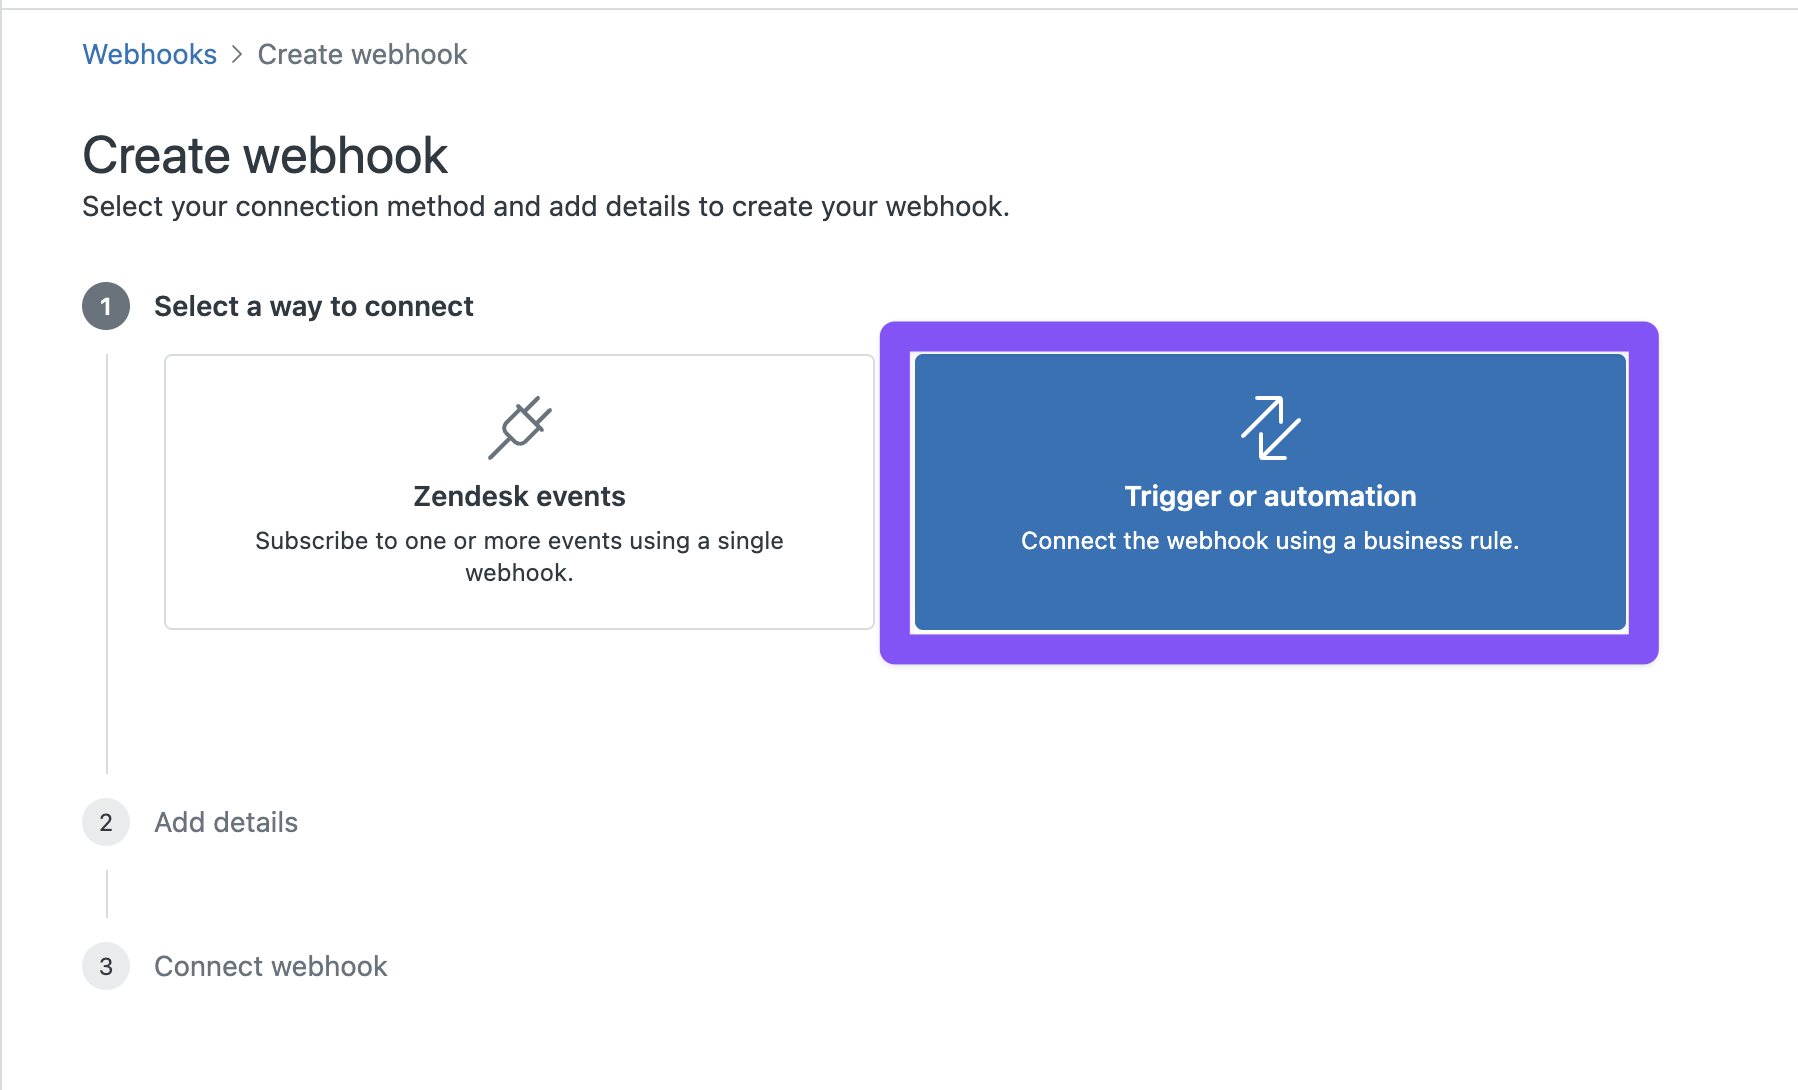
Click "Next" in the bottom right
Add the below under Step 2, "Add details"
- Name your webhook (e.g. Regal New Ticket Event)
- Description is optional
- Endpoint URL:
https://events.regalvoice.com/events - Request method: POST
- Request format: JSON
- Authentication: API Key
- Header Name: Authorization
- Value: YOUR API KEY (If you need your API email [email protected] or contact your implementation manager)
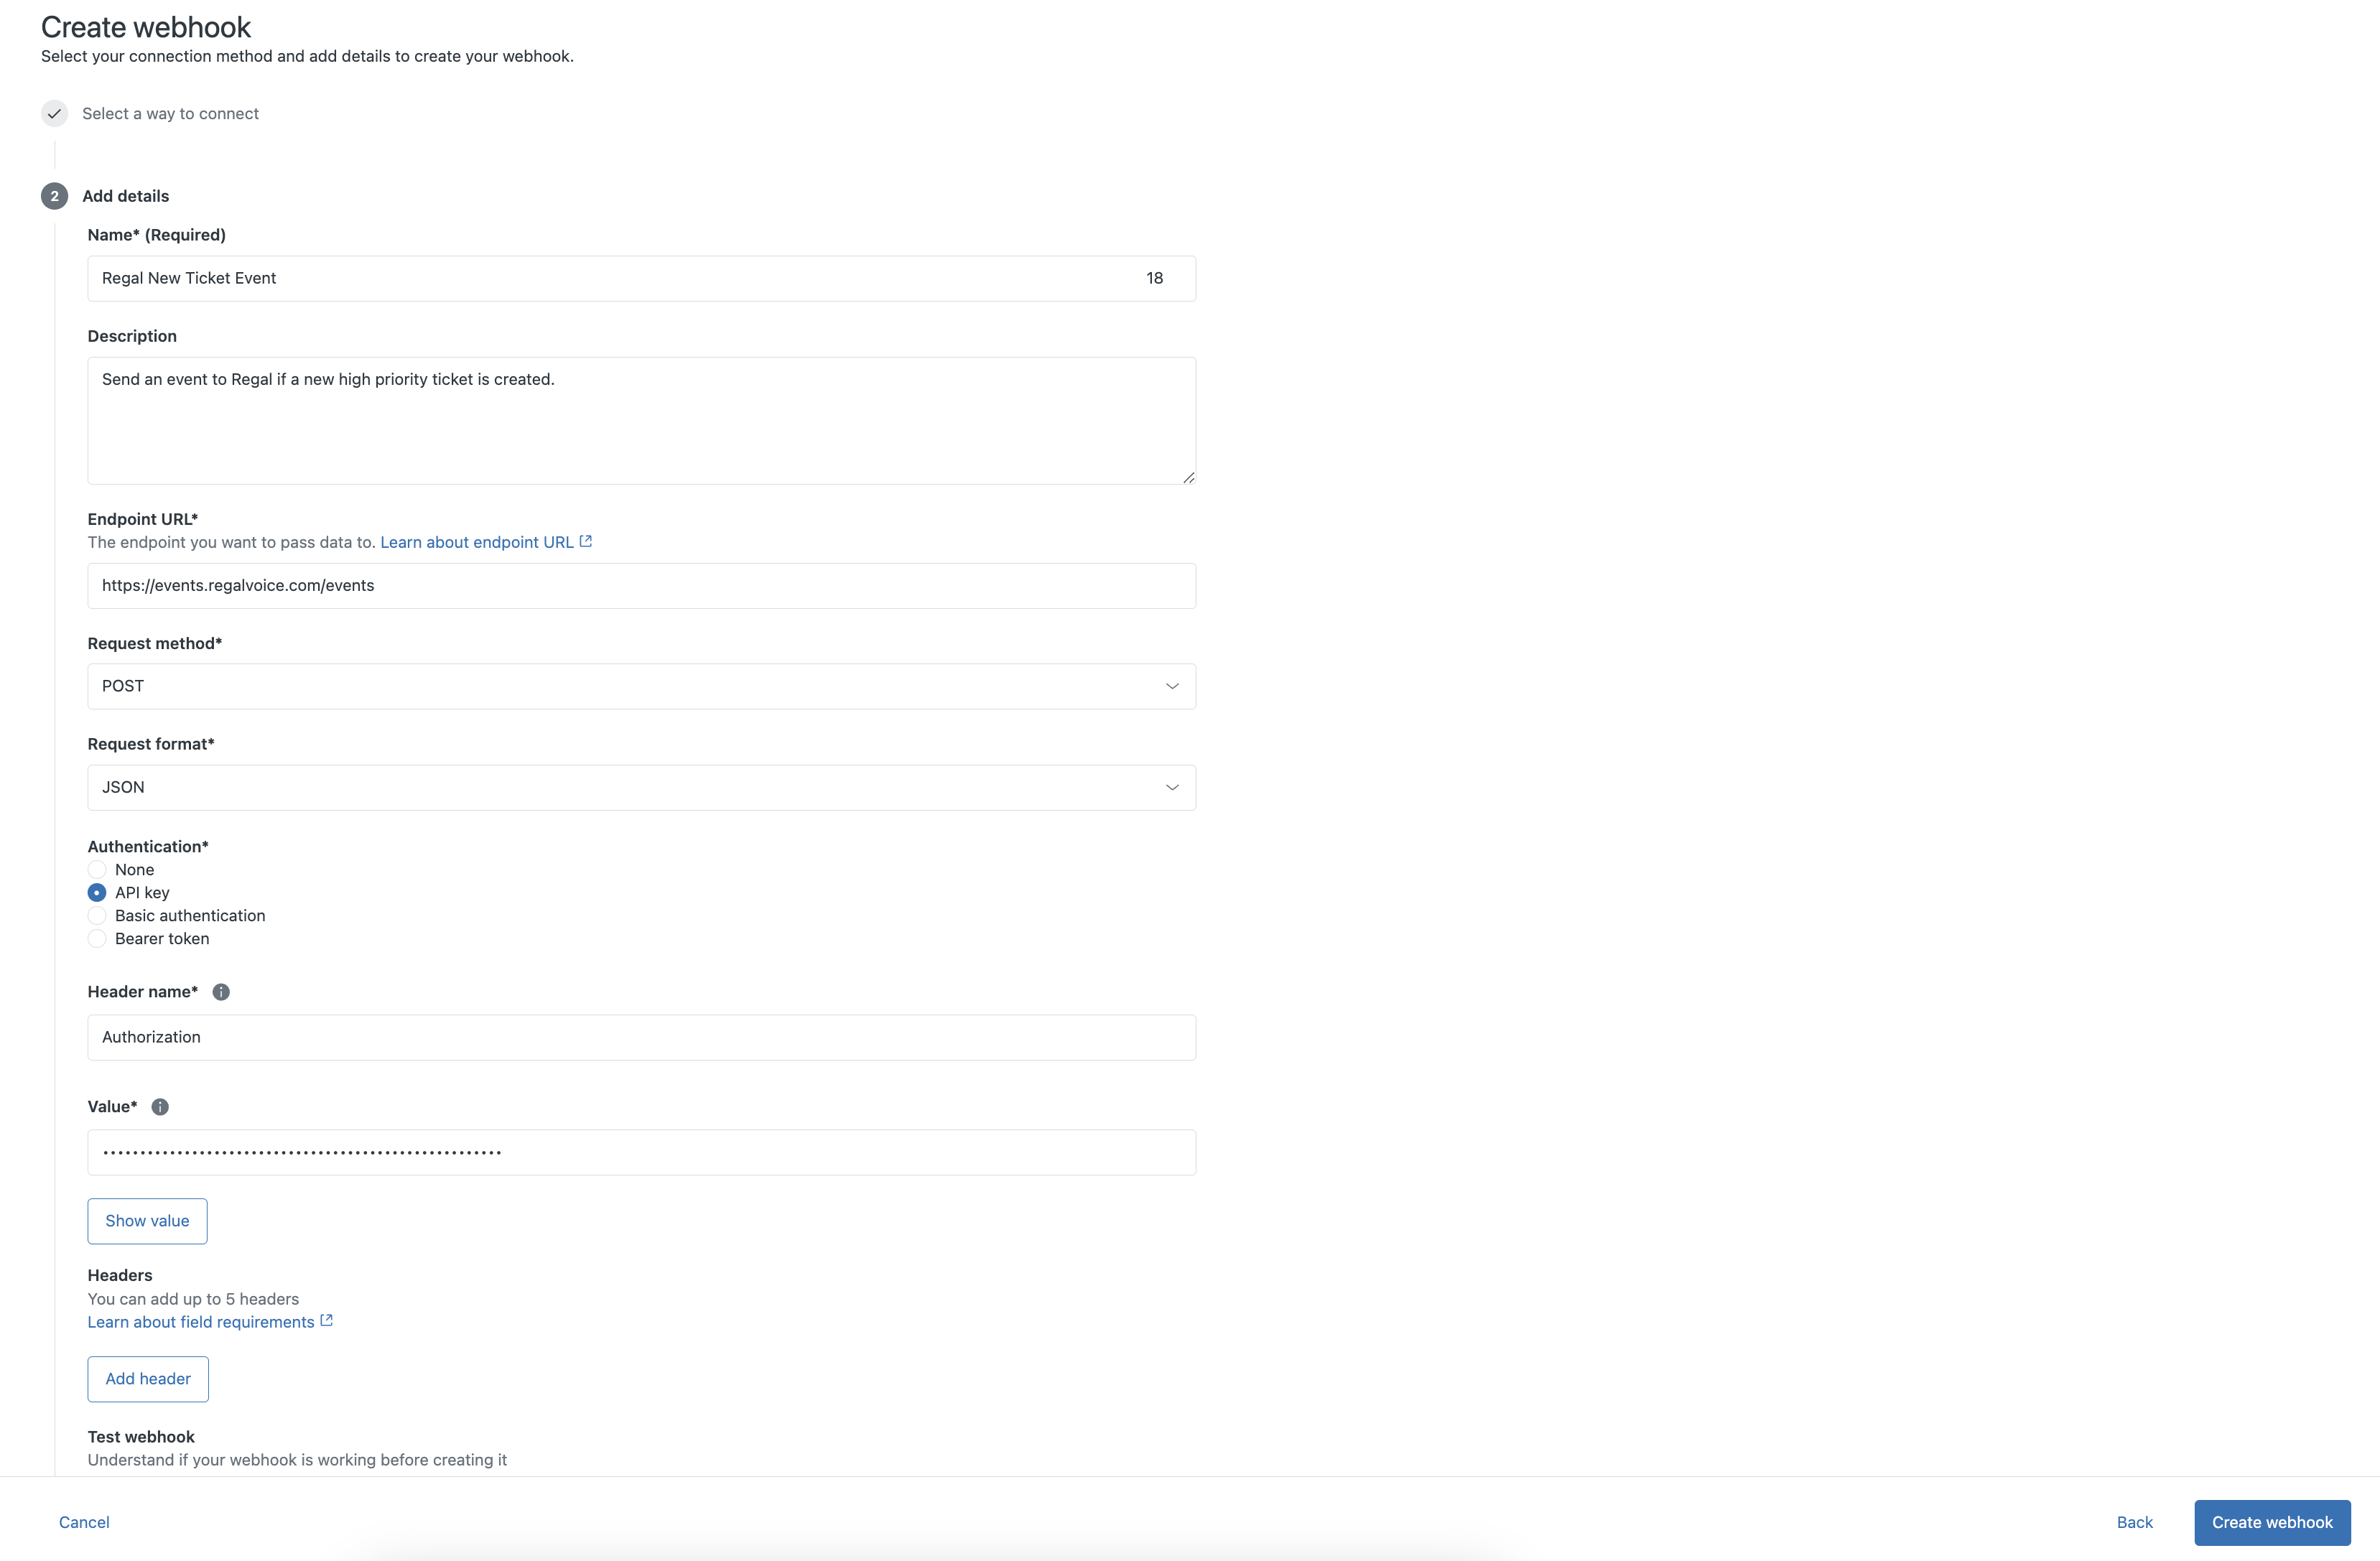
Click "Create Webhook" and then Click "Finish setup"
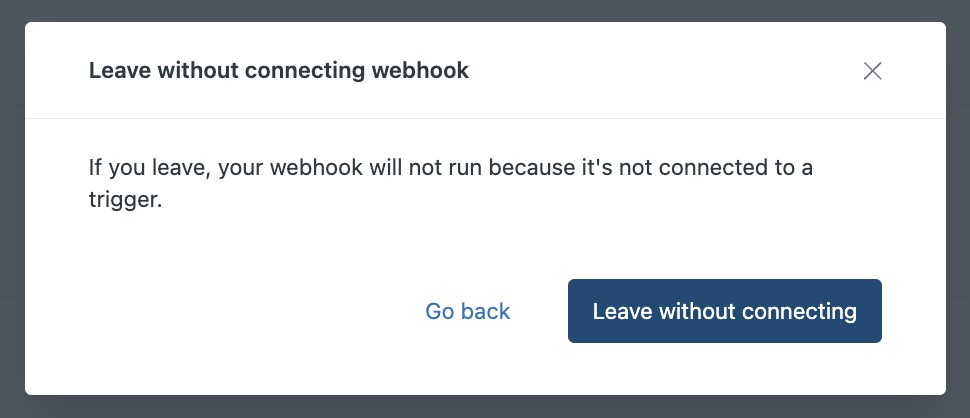
Click "Leave without connecting" on the next modal
2) Create Zendesk Business Rule Trigger
Now that you have created the base Regal Webhook, you now need to create a Trigger and Define the Webhook action.
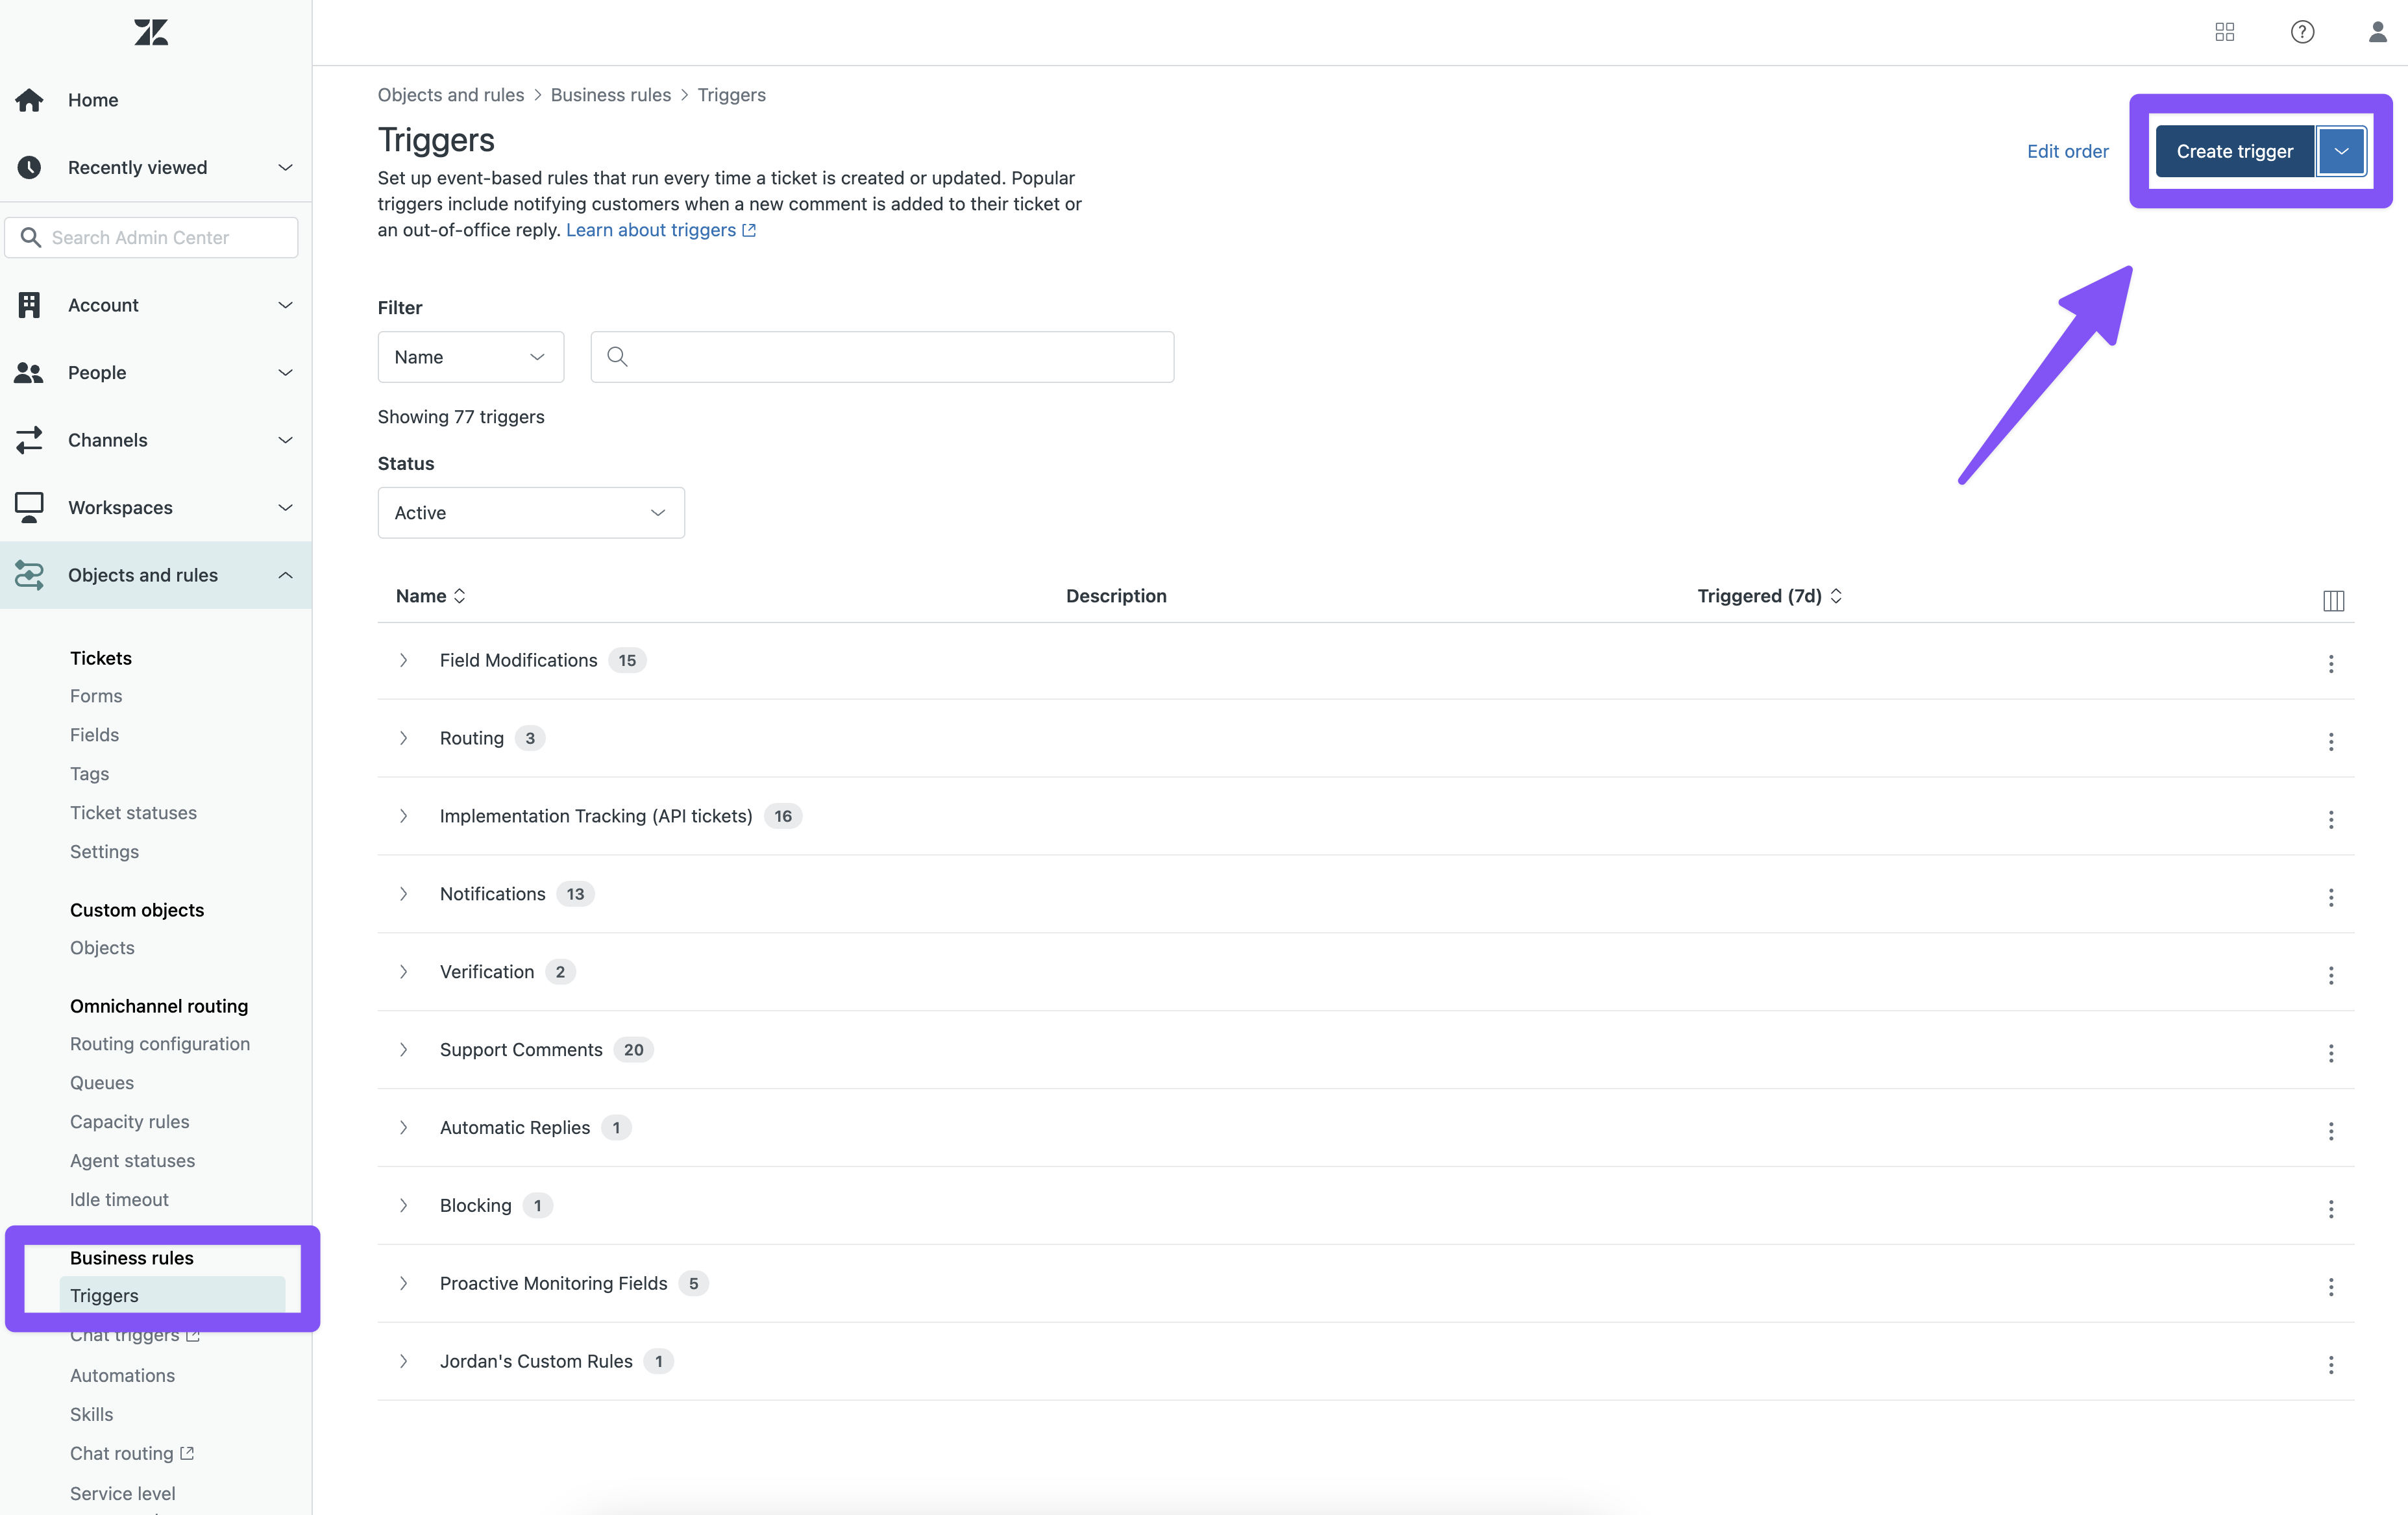
Navigate to Zendesk Admin Portal & Select "Triggers", under the "Objects and rules > Business Rules" section on the left hand bar
Click "Create Trigger" in the top right
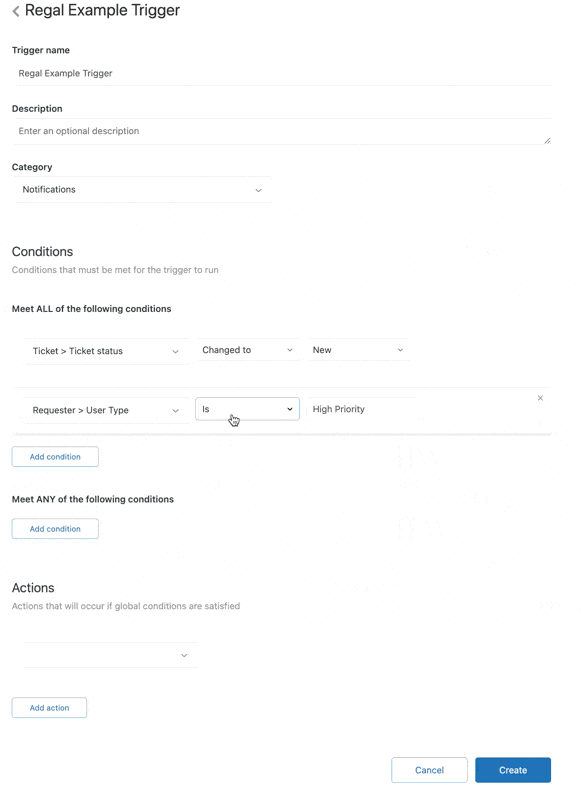
Configure the Trigger
- Trigger name (e.g. Regal Trigger - High Priority Ticket Created)
- Description
- Category: Add new category or add to existing
- Conditions: Specify the AND OR logic that will trigger the event to Regal
- In this example the Regal event will Trigger when the Zendesk ticket status is changes to "New" and the Requester User Type is "High Priority"
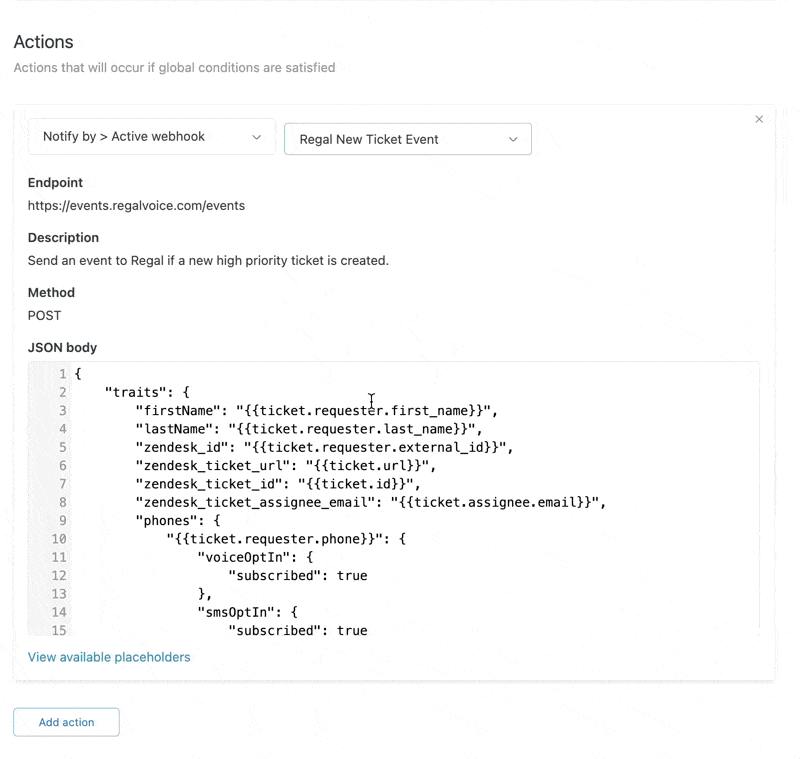
- Actions: Add the Webhook action you created previously by Navigating to "Other > Notify by" the selecting "Active Webhook"
- Configure JSON Body (example payload below) to match Regal's expected event format. More information can be found in our API docs.
- As you can see in the below example, we are able to add dynamic Zendesk placeholder to include in the event.
Click "Create"
Test Trigger & Webhook by performing the defined trigger and see if an event appears in the Regal "Recent Activity" feed.

Event Examples:
If you want to find more Regal examples, please refer to our API Documentation.
{
    "traits": {
        "firstName": "{{ticket.requester.first_name}}",
        "lastName": "{{ticket.requester.last_name}}",
        "zendesk_id": "{{ticket.requester.external_id}}",
        "zendesk_ticket_url": "{{ticket.url}}",
        "zendesk_ticket_id": "{{ticket.id}}",
        "zendesk_ticket_assignee_email": "{{ticket.assignee.email}}",
        "phones": {
            "{{ticket.requester.phone}}": {
                "voiceOptIn": {
                    "subscribed": true
                },
                "smsOptIn": {
                    "subscribed": true
                }
            }
        },
        "emails": {
            "{{ticket.requester.email}}": {
                "label": "Zendesk",
                "emailOptIn": {
                    "subscribed": true
                }
            }
        }
    },
    "name": "High Priorty Zendesk Ticket",
    "properties": {
        "zendesk_organization_name": "{{ticket.organization.name}}",
        "zendesk_ticket_tittle": "{{ticket.title}}",
        "zendesk_ticket_url": "{{ticket.url}}",
        "zendesk_ticket_id": "{{ticket.id}}",
        "zendesk_ticket_assignee_email": "{{ticket.assignee.email}}"
    },
    "eventSource": "Zendesk"
}
Updated 4 months ago