Calendly
Send event data to Regal when a Calendly call is scheduled, rescheduled or canceled
Professional tier (or higher) Calendly plan required to integrate
In order for your Calendly account to integrate with other systems and send the appropriate API requests, you must have at least a Professional tier account.
This guide outlines how you can use Calendly as a source for sending events to Regal when a Calendly call is scheduled, rescheduled or canceled.
Step 1: Configure your Calendly Invitee Questions
- In your Calendly account, edit the Settings for your Event and navigate to "Additional Options" > "Invitee Questions"

-
Click "+ Add New Question"
-
Name the question "Contact Phone Number" or "Phone Number". Mark as "Required". Change the Answer Type to "Phone Number", and hit "Apply"

Must have "Phone Number" in the question or Regal won't be able to recognize it
- Click "Save & Close"
- If you any other additional question you'd like to pass to Regal and make visible on the Agent Desktop, remove any punctuation from the question.
- For example, the standard Please share anything that will help prepare for our meeting. question should be updated to Please share anything that will help prepare for our meeting (with no period at the end).
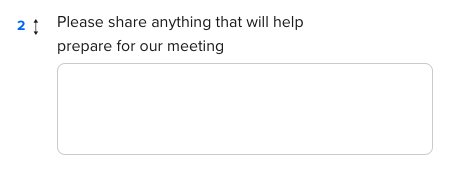
Removing punctuation will allow Regal to pass the question and answer as an event property, which can be mapped to a contact attribute via your Calendly journey.
Step 2: Retrieve your Calendly account's Personal Access Token
Integrations → API & webhooks → Generate new token
- Refer to Calendly's authentication guide for instructions on how to generate a personal access token. You will need this token in the following step.
Step 3: Connect your Calendly Account Through the Regal App
-
Log in to the Regal app and navigate to "Settings" > "Integrations"
-
Find the Calendly Integration card and click "Connect"

-
Enter the Personal Access Token from Step 2, and click "Save"
-
The Calendly tile should now look like this:

Your integration is live!
To test your integration, schedule a meeting with one of your Calendly links, then navigate to Recent Activity in the Regal app. You should see a Calendly Call Scheduled event. Cancel the event through Calendly to remove it from the Regal tasks.
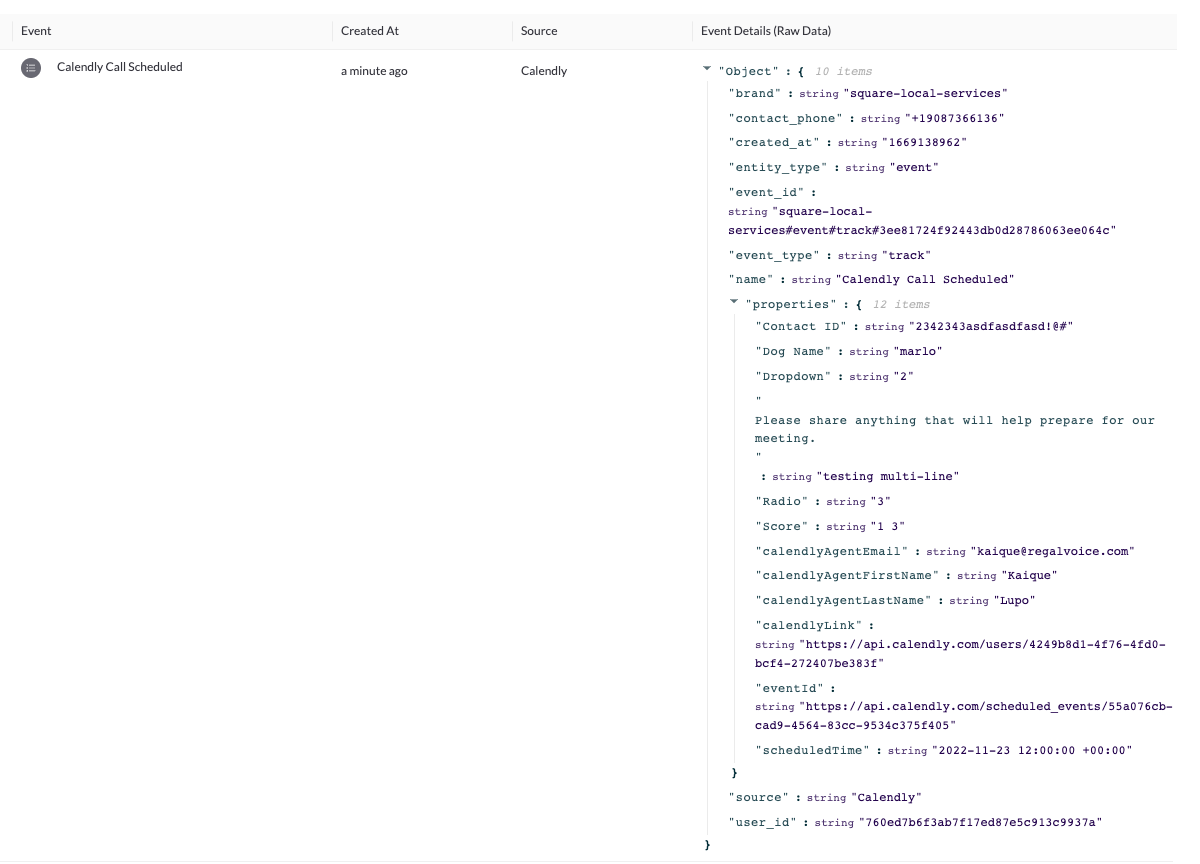
Calendly Call Scheduled
When a Calendly call is scheduled, you will see a Calendly Call Scheduled event in the Recent Activity page.
Custom Properties
When defining your event form in Step 1, any responses to custom fields added to the form will appear in a "properties" block in the event json, as seen below:
Calendly Call Cancelled
When a Calendly call is cancelled, the corresponding Regal event will also be automatically cancelled. You will see a Calendly Call Canceled event in the Recent Activity page.
Rescheduling Calendly Calls
When a user reschedules a Calendly Call, in the Recent Activity page you will first see a Calendly Call Canceled event and then a new Calendly Call Scheduled event. This is consistent with how Calendly handles reschedules.
Calendly Calls in Regal
The Calendly Call Scheduled event can be used to trigger a journey that allows you to customize when the task is created, and to which agent or team the task is routed.
Next Steps:
Check out this article for a complete overview of building out your first Calendly journey.
If you have any questions about this integration guide email [email protected].
Updated 12 months ago