Slack
Create Slack Notifications from Regal Events
This guide describes how to set up Slack notifications when new Regal tasks are created or any other customer action happens through Regal. Slack notifications will come into any channel(s) of your choosing.
Configure Custom Slack Notifications Using Slack's Workflow Builder
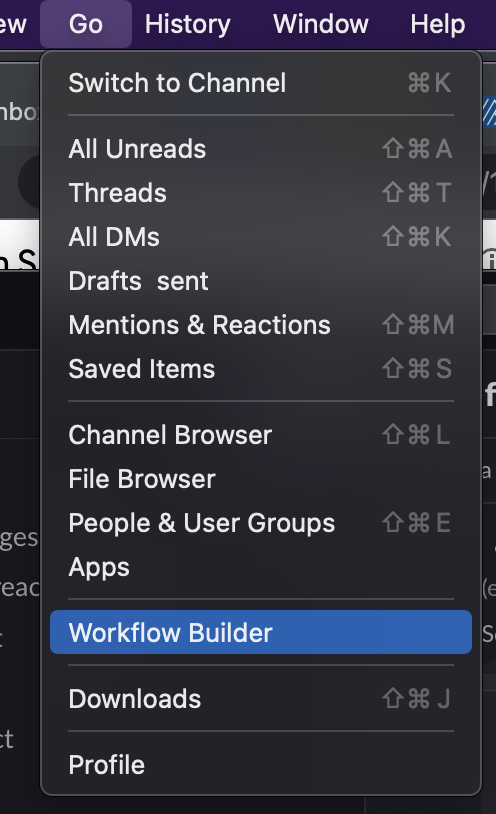
Step 1: From Slack, select Go > Workflow Builder
Step 2: Click "Create" and give your workflow a name, for example “Regal Notifications”
Step 3: Select "Webhook" from the "Choose a way to start this workflow" options
Step 4: Add step for sending a message to an existing channel
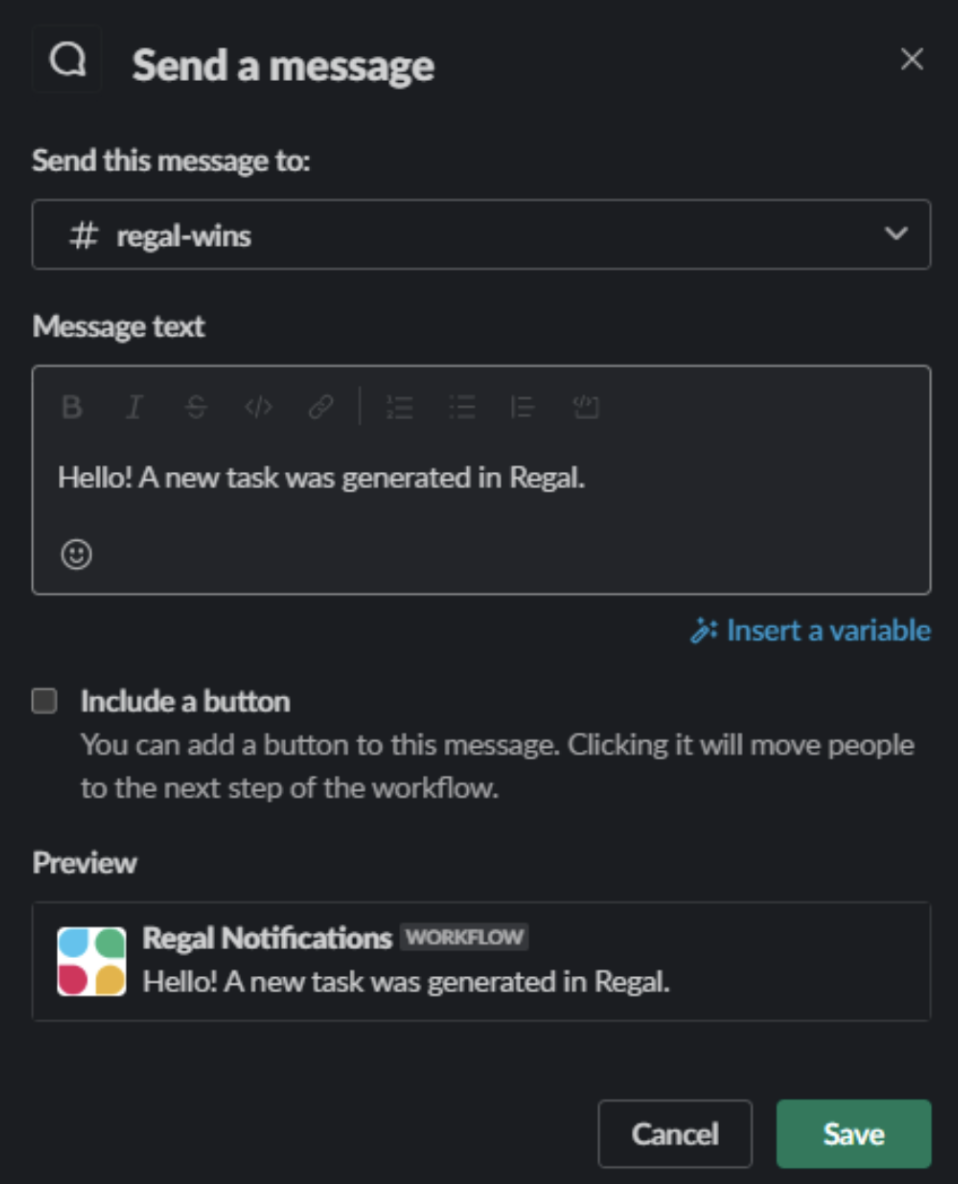
Step 5: Click "Publish" to generate the webhook URL. Copy and save this URL for configuration in Regal.
Create Regal Journey to Trigger Events to Slack
Step 6: In your Regal account, create a new Journey
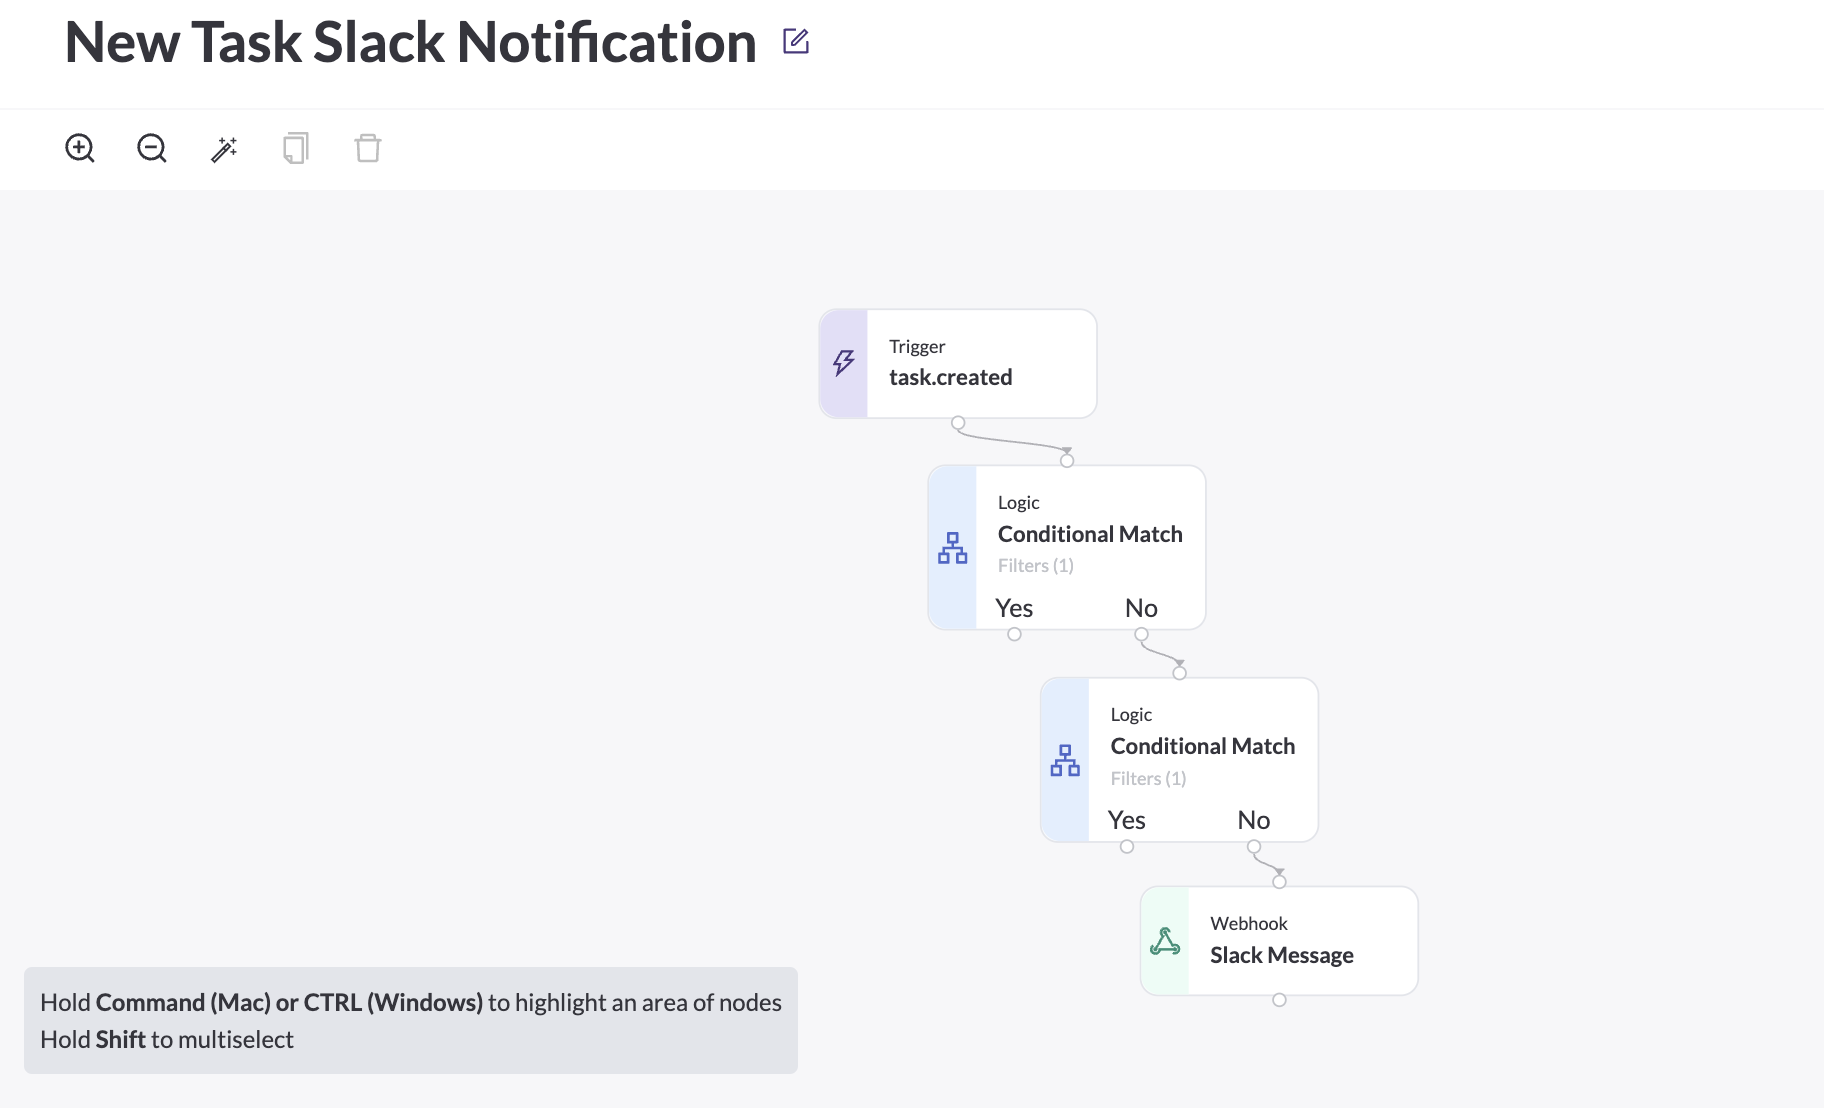
- Select the appropriate trigger (for example, the task.created Regal Voice event if you wanted to notify the channel each time a task is generated)
- Configure any custom logic using Conditional nodes - for example you might want to filter out Outbound SMS and Manual Outbound Calls since those are agent-initiated
- Insert a webhook node to trigger the Slack workflow:
- Endpoint URL: copied from step 6
- Method: POST
- JSON Payload: Enter whatever message you'd like
Contact Profile Attributes in Your Slack Notifications
This Journey Webhook payload can be configured to include any contact profile attributes and/or triggering event properties, which can then be referenced inside your Slack workflow. See the below section for more information.
Contact Attributes => Variables in Slack Notifications
Any contact trait/attribute or journey-triggering event property can be included in the webhook used to trigger the Slack workflow. These fields can be referenced in the message of your workflow. Follow these steps to add variables to your Slack workflow:
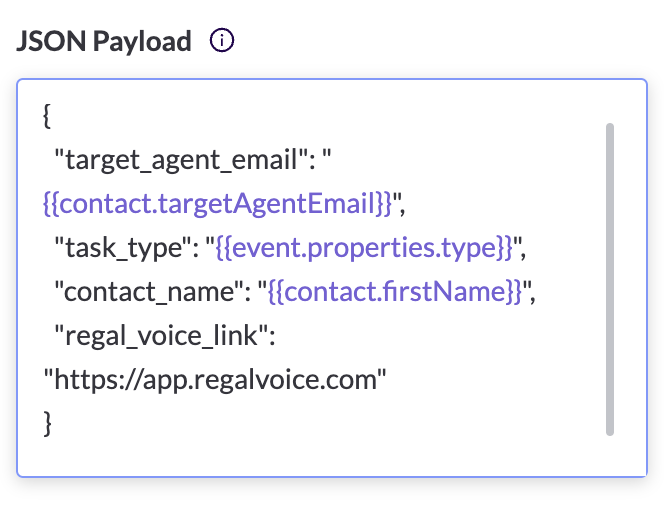
Step 6: In your Regal journey webhook node JSON payload, add the contact attributes you want to reference in your Slack message. The format for these fields should be: “variable_name”: “{{REGAL DYNAMIC PROPERTY}}”
Here’s an example webhook:
Step 6: In Slack, add these variables to your Slack workflow.
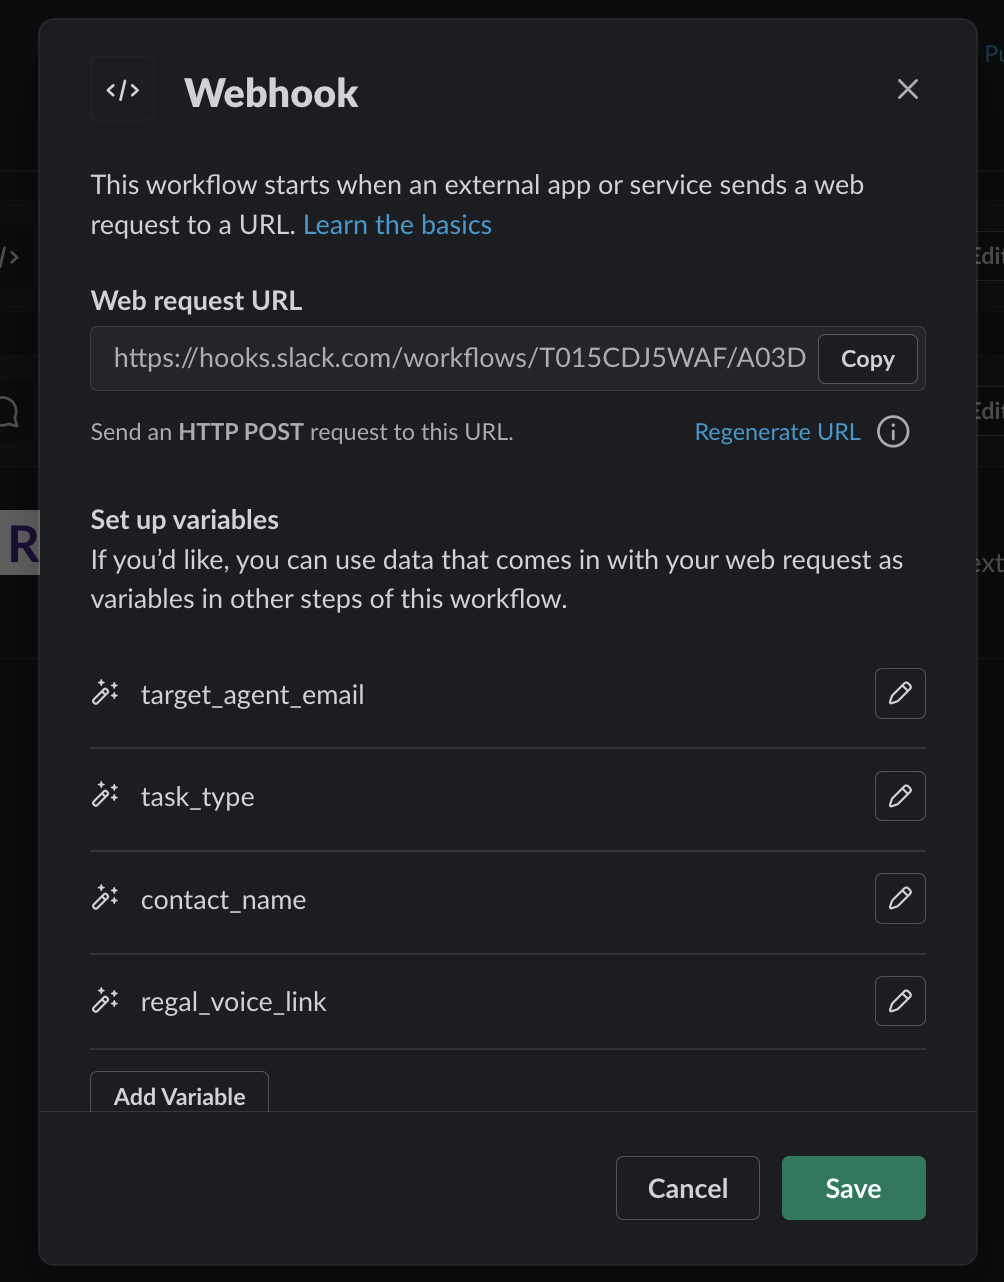
- Select “Edit” on the “Starts when an app or service sends a web request” step of the workflow in Slack
- Select the “Add Variable” button
- Key: variable name from your Regal webhook payload (contact_last_name from the example above)
- Data type: usually set to text - you may want to select the Slack user email option if you are pulling an agent email from the Regal contact profile and want to notify that agent directly in the Slack message
The below example is showing a variable for the target agent, the task type, the contact name and a link to the Regal app.
Step 6: Add the variable to your Slack message
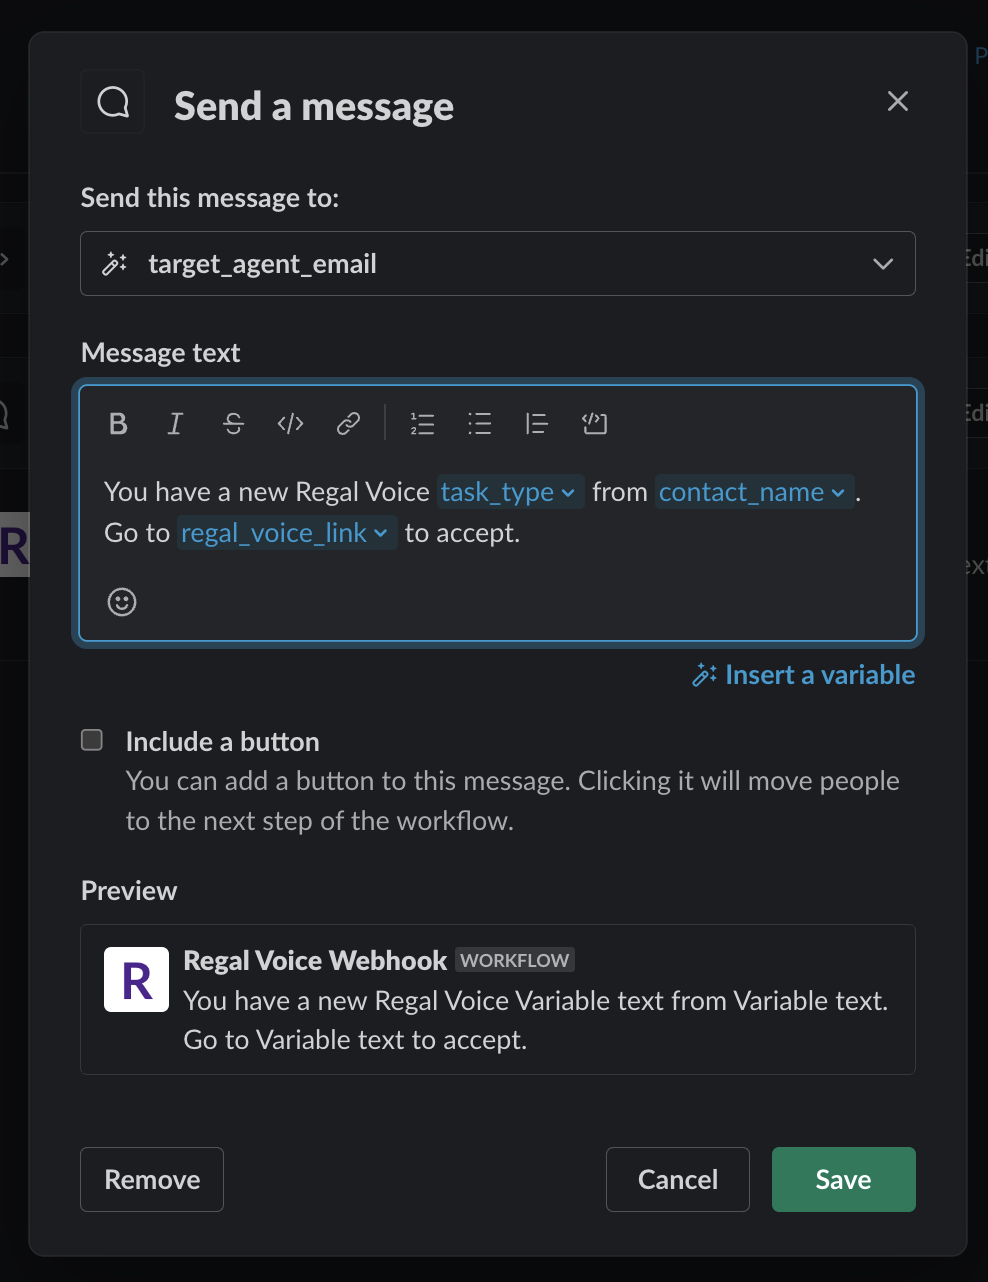
- Edit the message step(s) of your Slack workflow
- Select the “Insert a variable” option below the text box to pull in any custom variables you’ve added to the workflow
The below example notification would arrive in the Slack channel of the target agent, with the message: "You have a new Regal Voice Scheduled Callback from Rebecca. Go to app.regalvoice.com to accept.
Updated over 1 year ago
