Microsoft Dynamics 365
This guide describes how to use Microsoft Dynamics as a source for sending your customer profile and event data to Regal using a Microsoft Power App Flows.
Sending data from MS Dynamics to Regal
Regal relies on the MS Power App Flows to send data to Regal. You can refer to Microsoft's developer documentation for additional information and examples.
1) Create New Power App Solution
In this section we'll create a new Publisher and Solution to house all the future Flows within Power Apps.
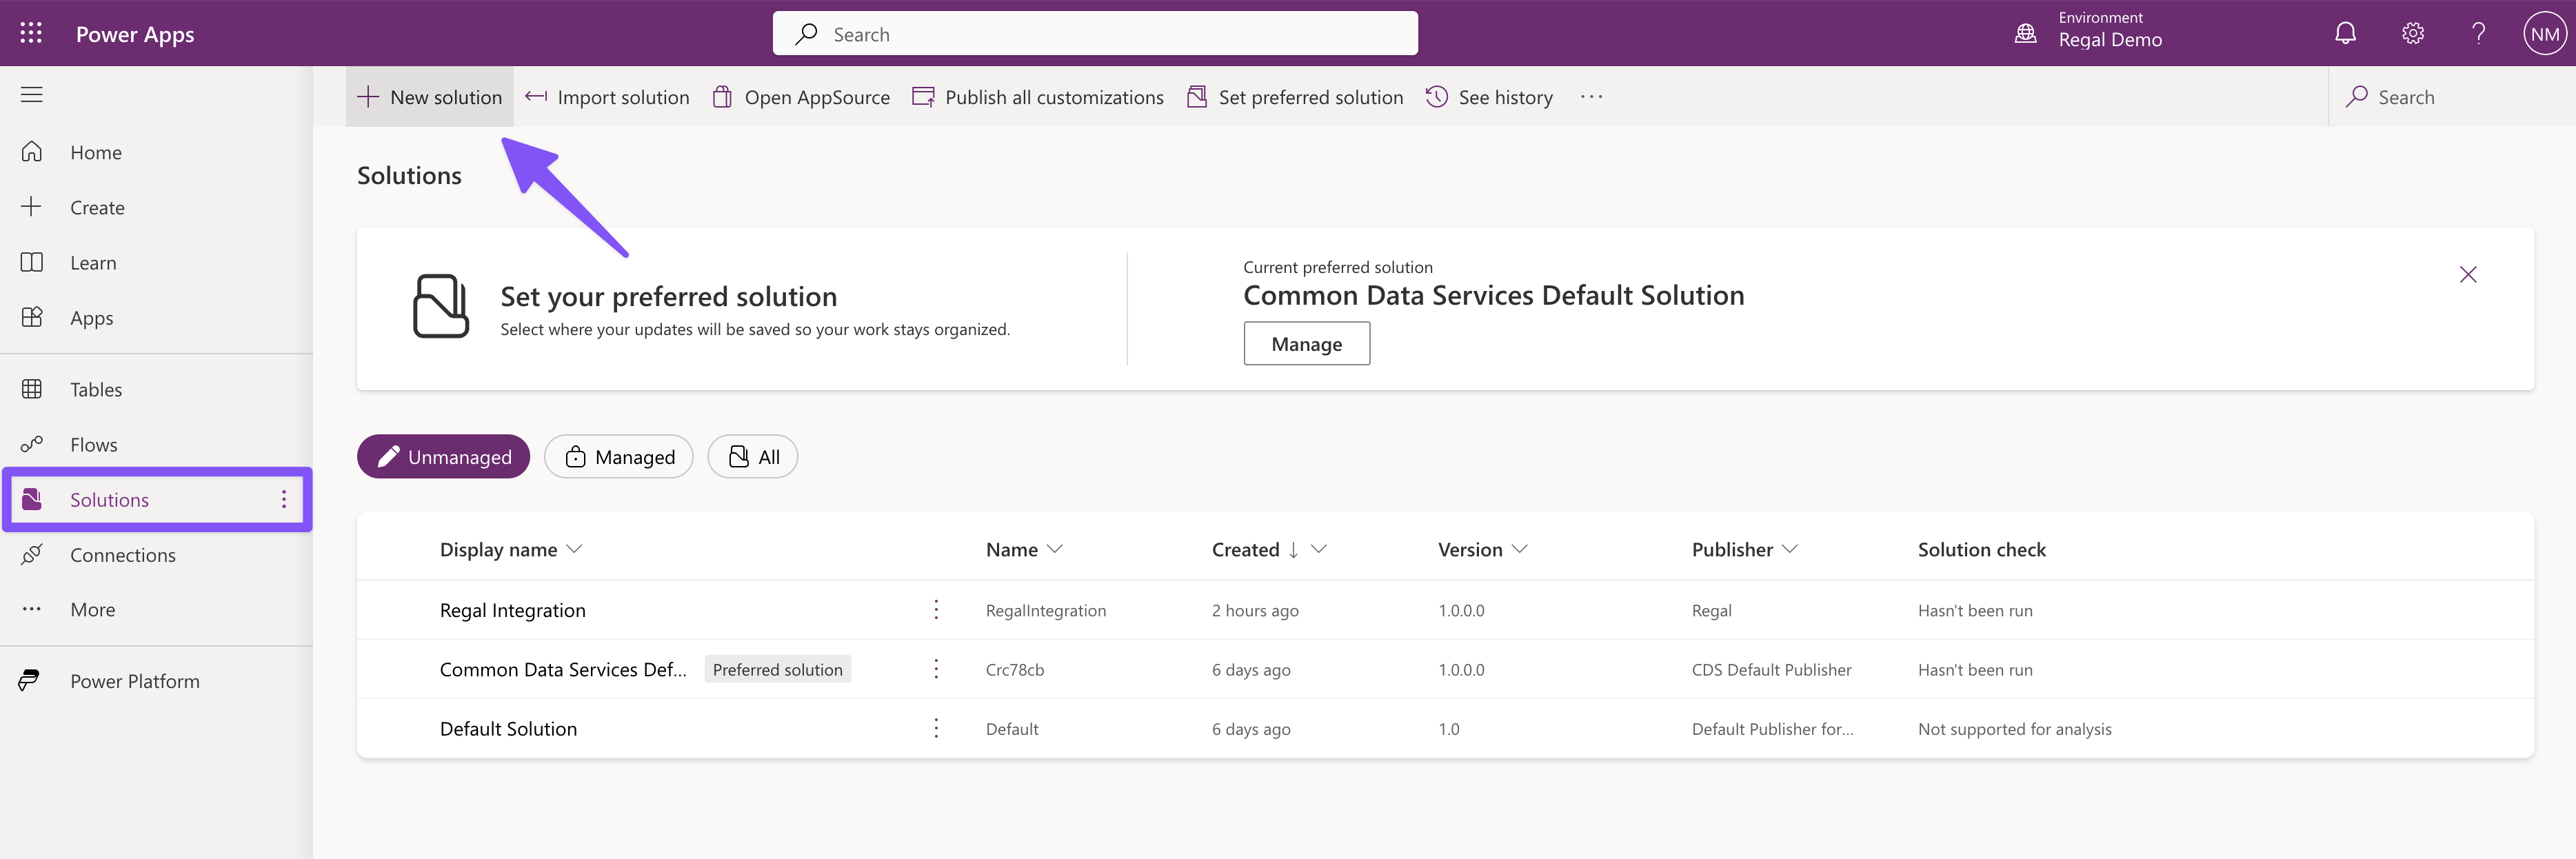
Navigate to Power Apps App
On the left hand side click "Solutions"
In the top left, click the "New Solution" button
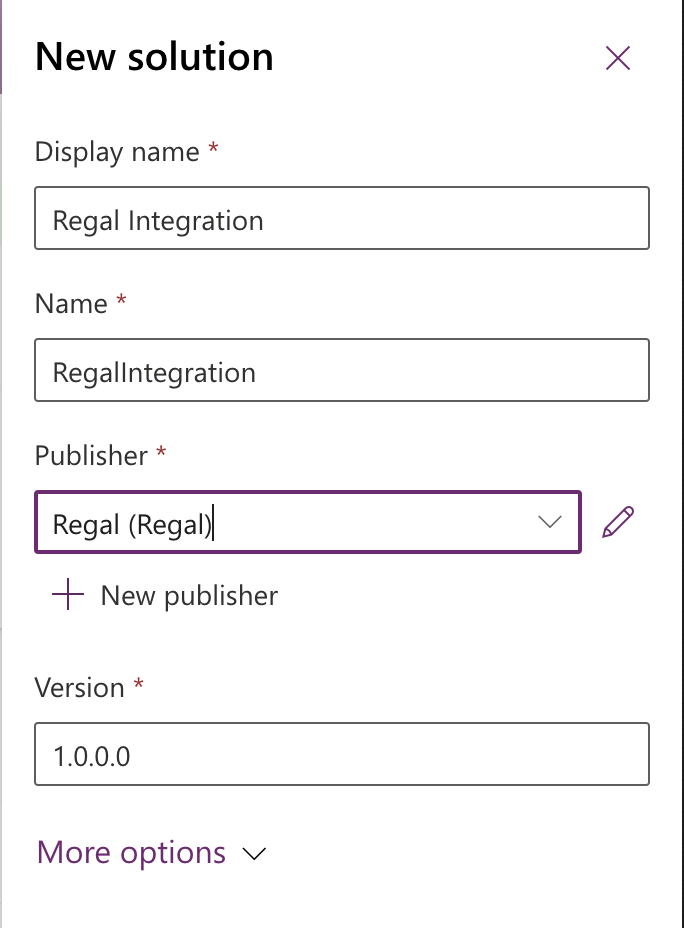
Give the solution a name (e.g. Regal Integration)
Create a new Publisher for reporting
2) Create New Power App Flows
Once the publisher is created click on "Cloud Flows" on the right hand side, under Objects
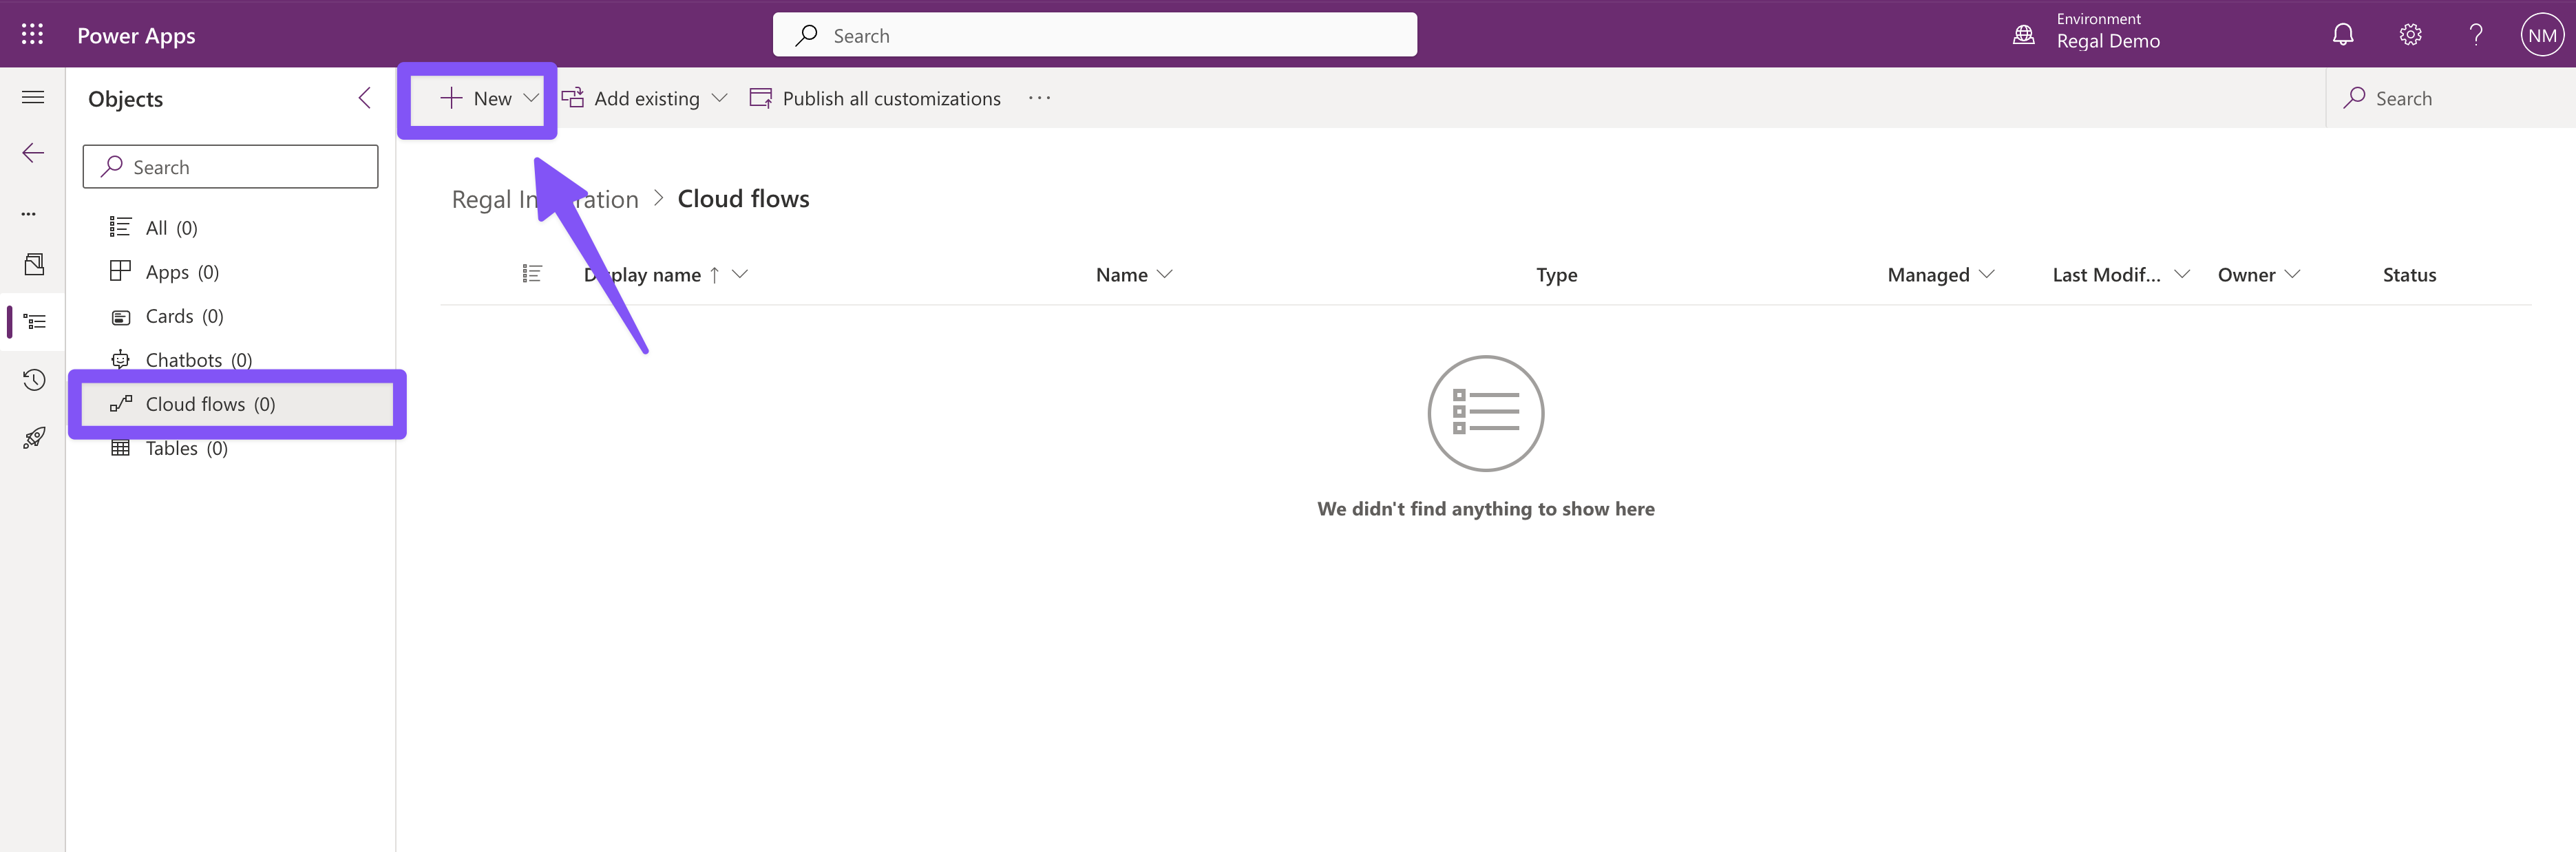
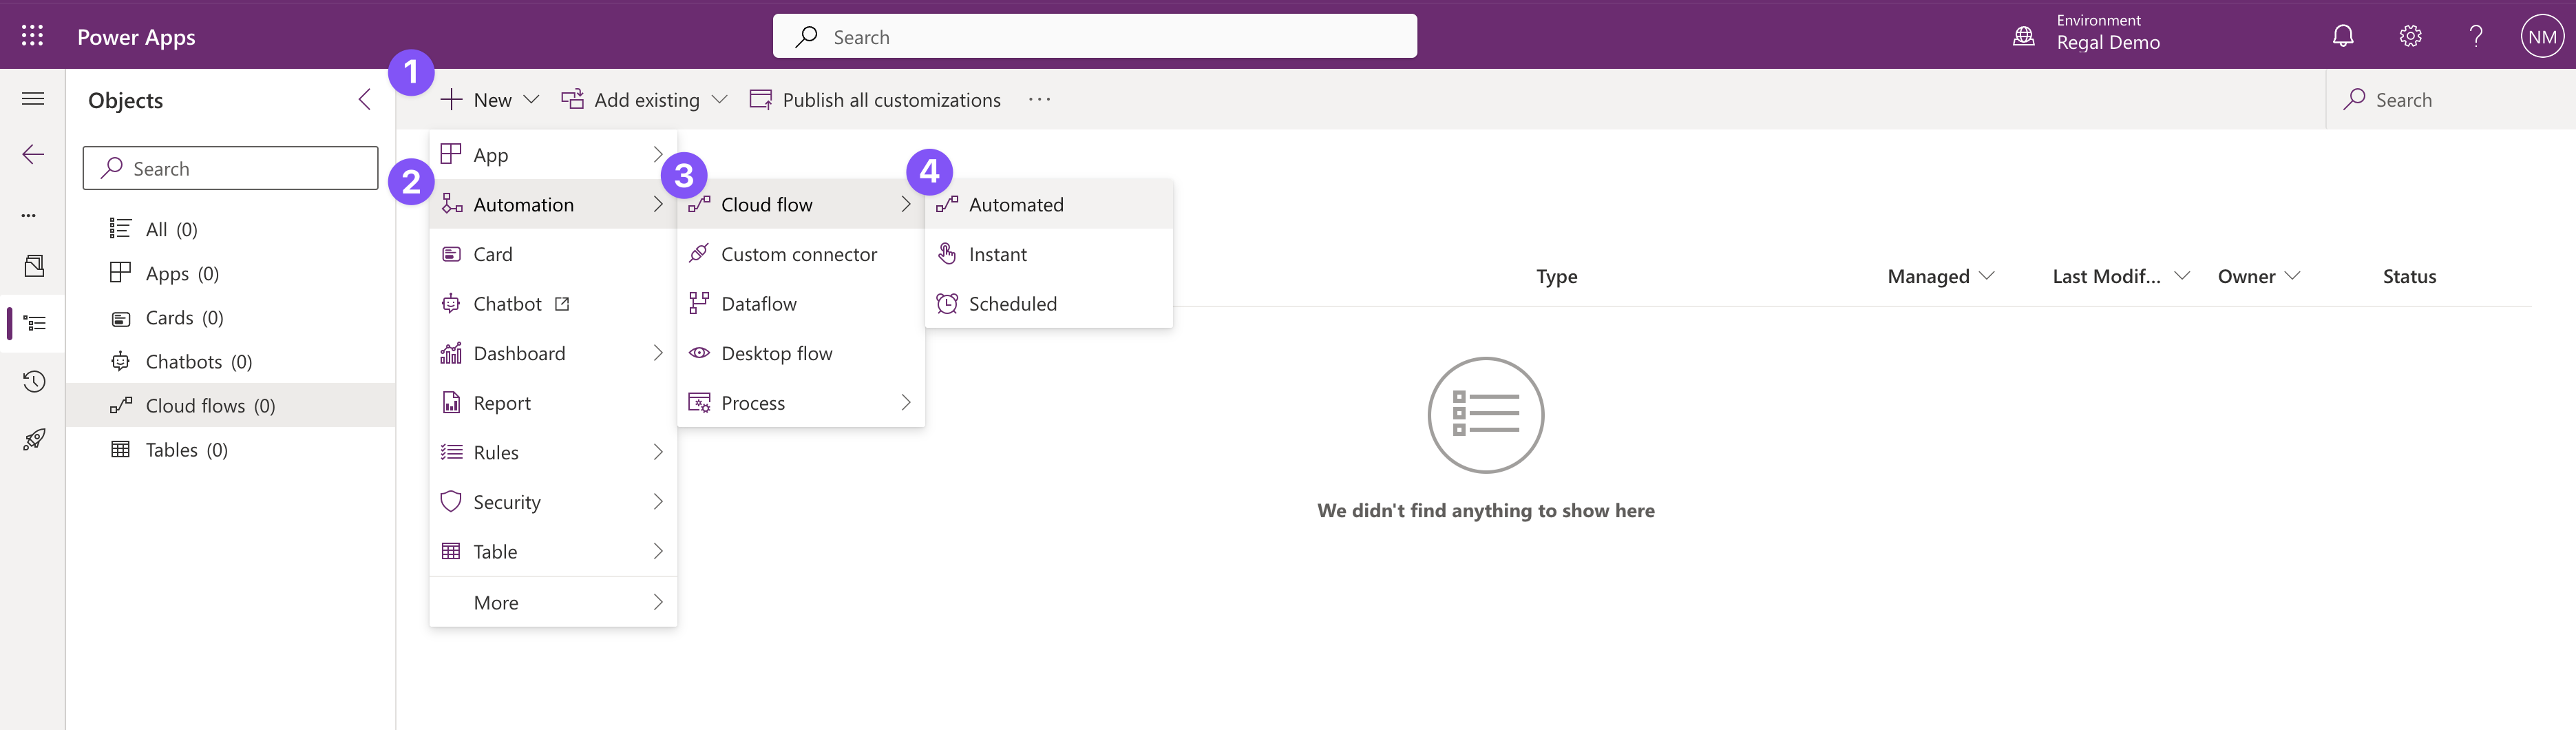
In the top left, click the "New" button and select "Automation > Cloud Flow > Automated"
In the next pop up, press "Skip"
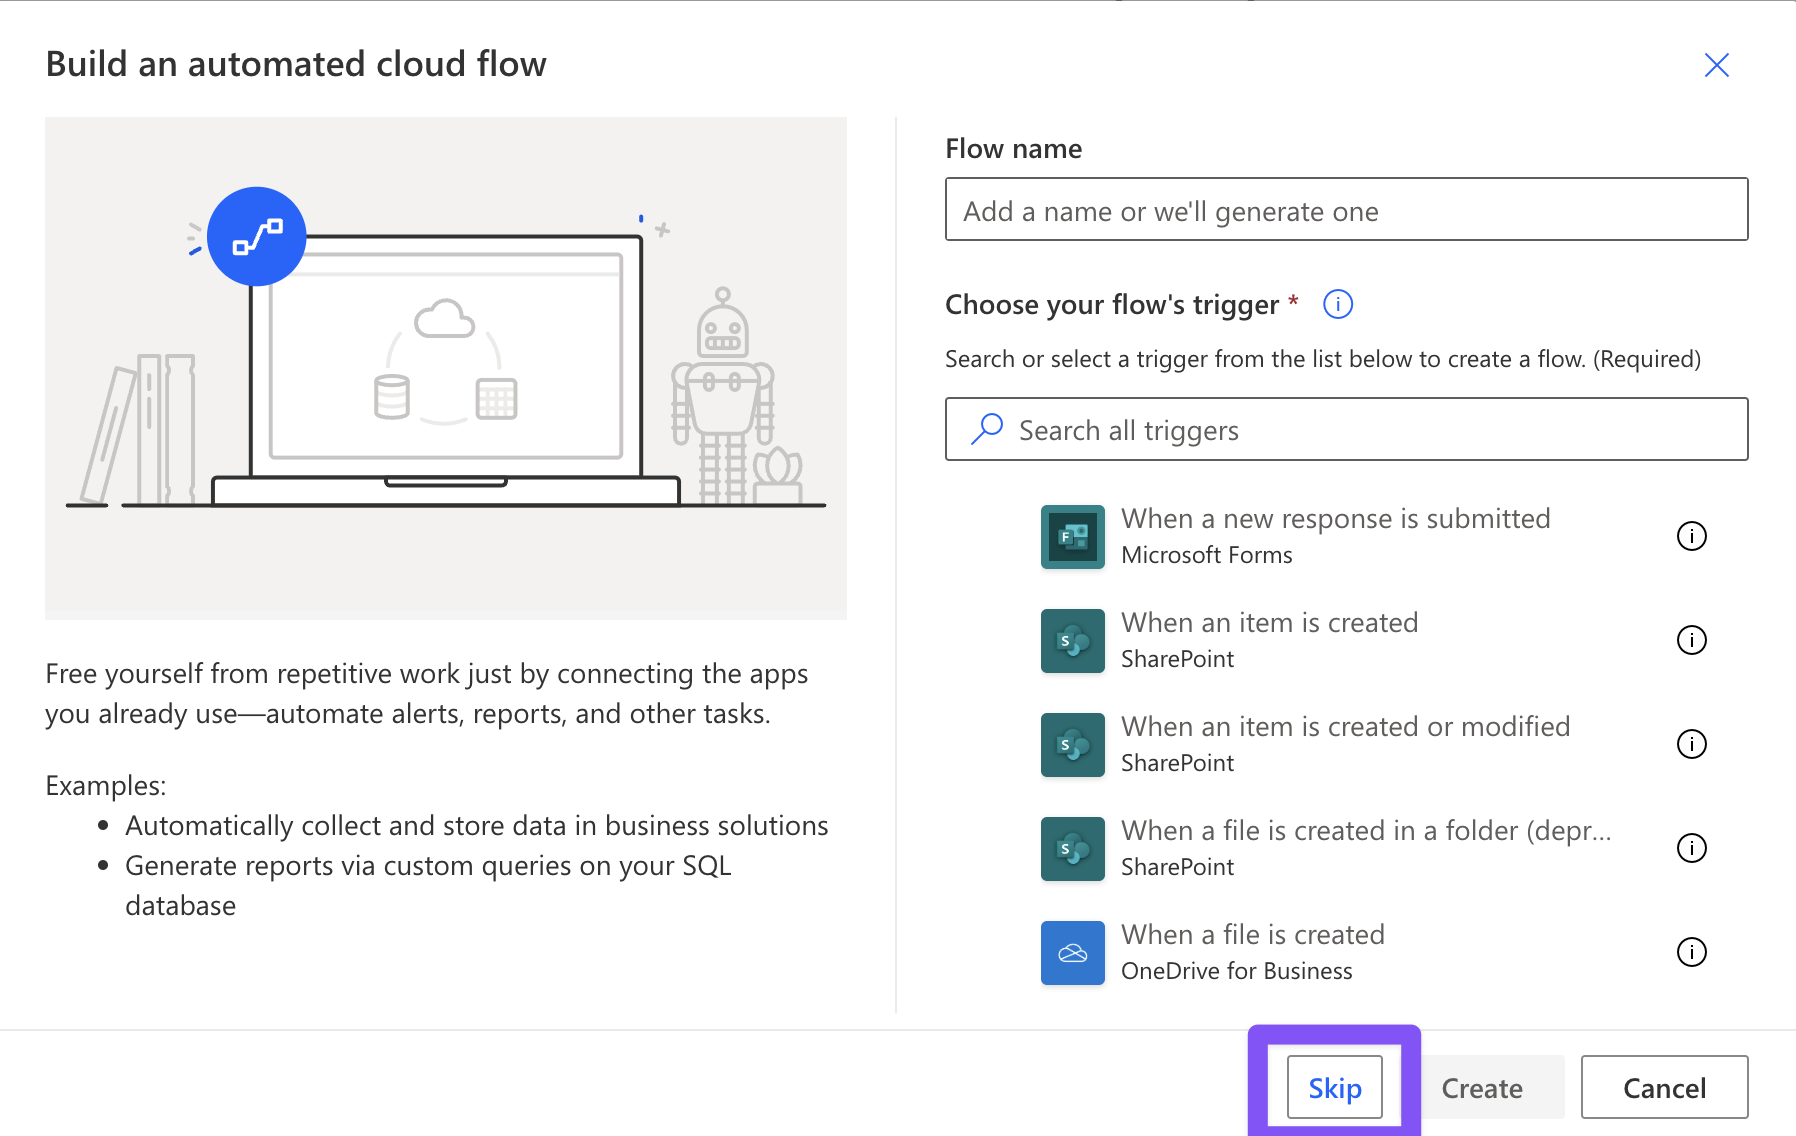
Name your Flow (e.g. Regal Integration - New Lead Event)
Now you can select a Trigger event, that will automatically trigger this Flow and send data to Regal.
In this example, we are looking to send an event to Regal when a new record is added to Dynamics 365 using Microsoft Dataverse.
I am first going to filter on the app I want to trigger the flow with. In this example, we are looking to send an event to Regal when a new record is added to a Dynamics 365 Dataverse table.
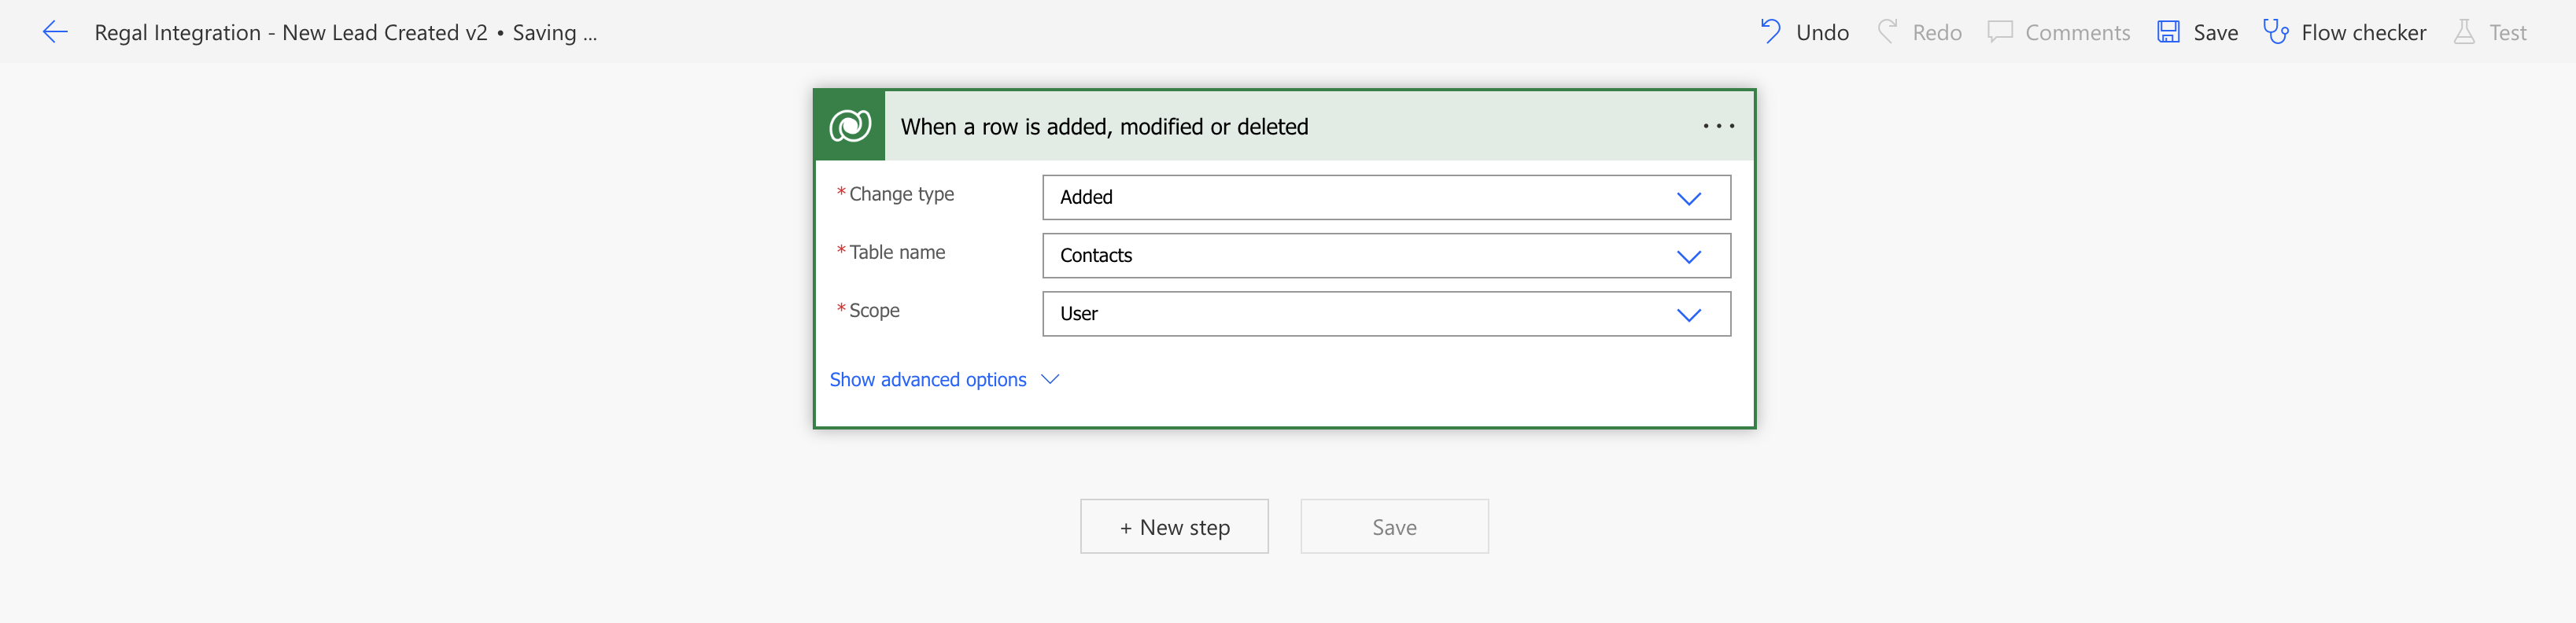
I am then going to select "When a row is added, modified or deleted"
Specify the following fields:
- Change type: Select desired action (e.g. Added)
- Table name: Select the underlying table (e.g. Contact)
- Scope: Choose a scope to limit which rows can trigger the flow
Click the "New Step" button to add an additional step
Search for HTTP, and select the HTTP step under actions
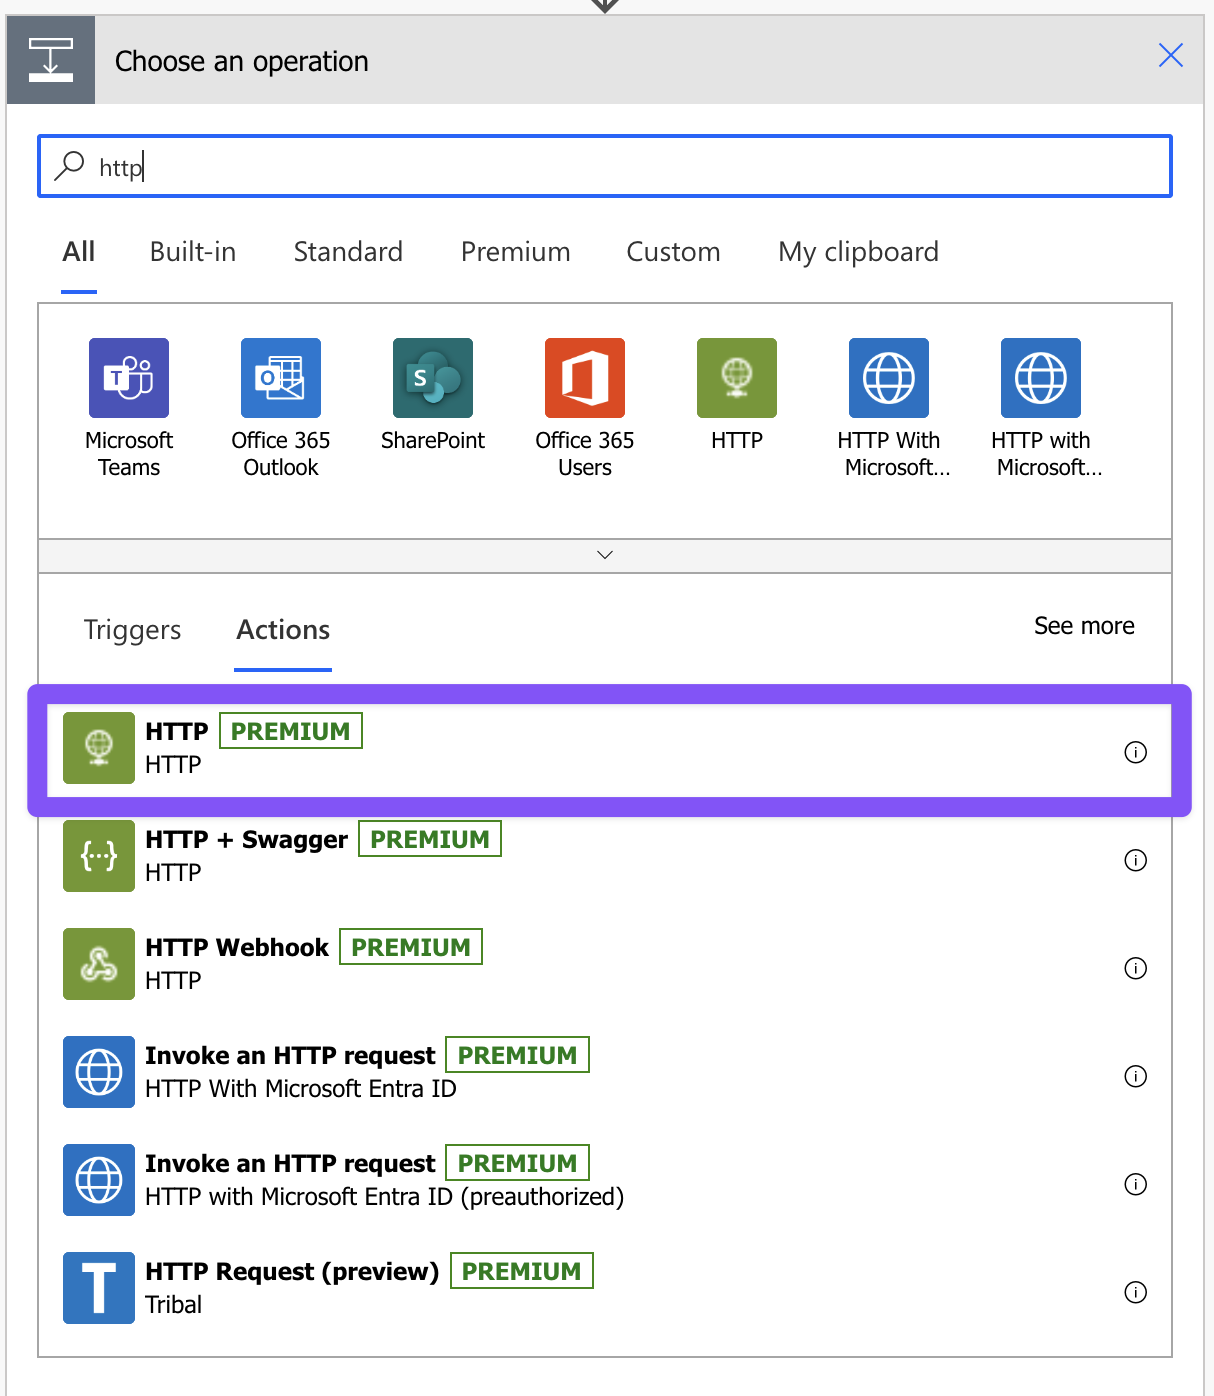
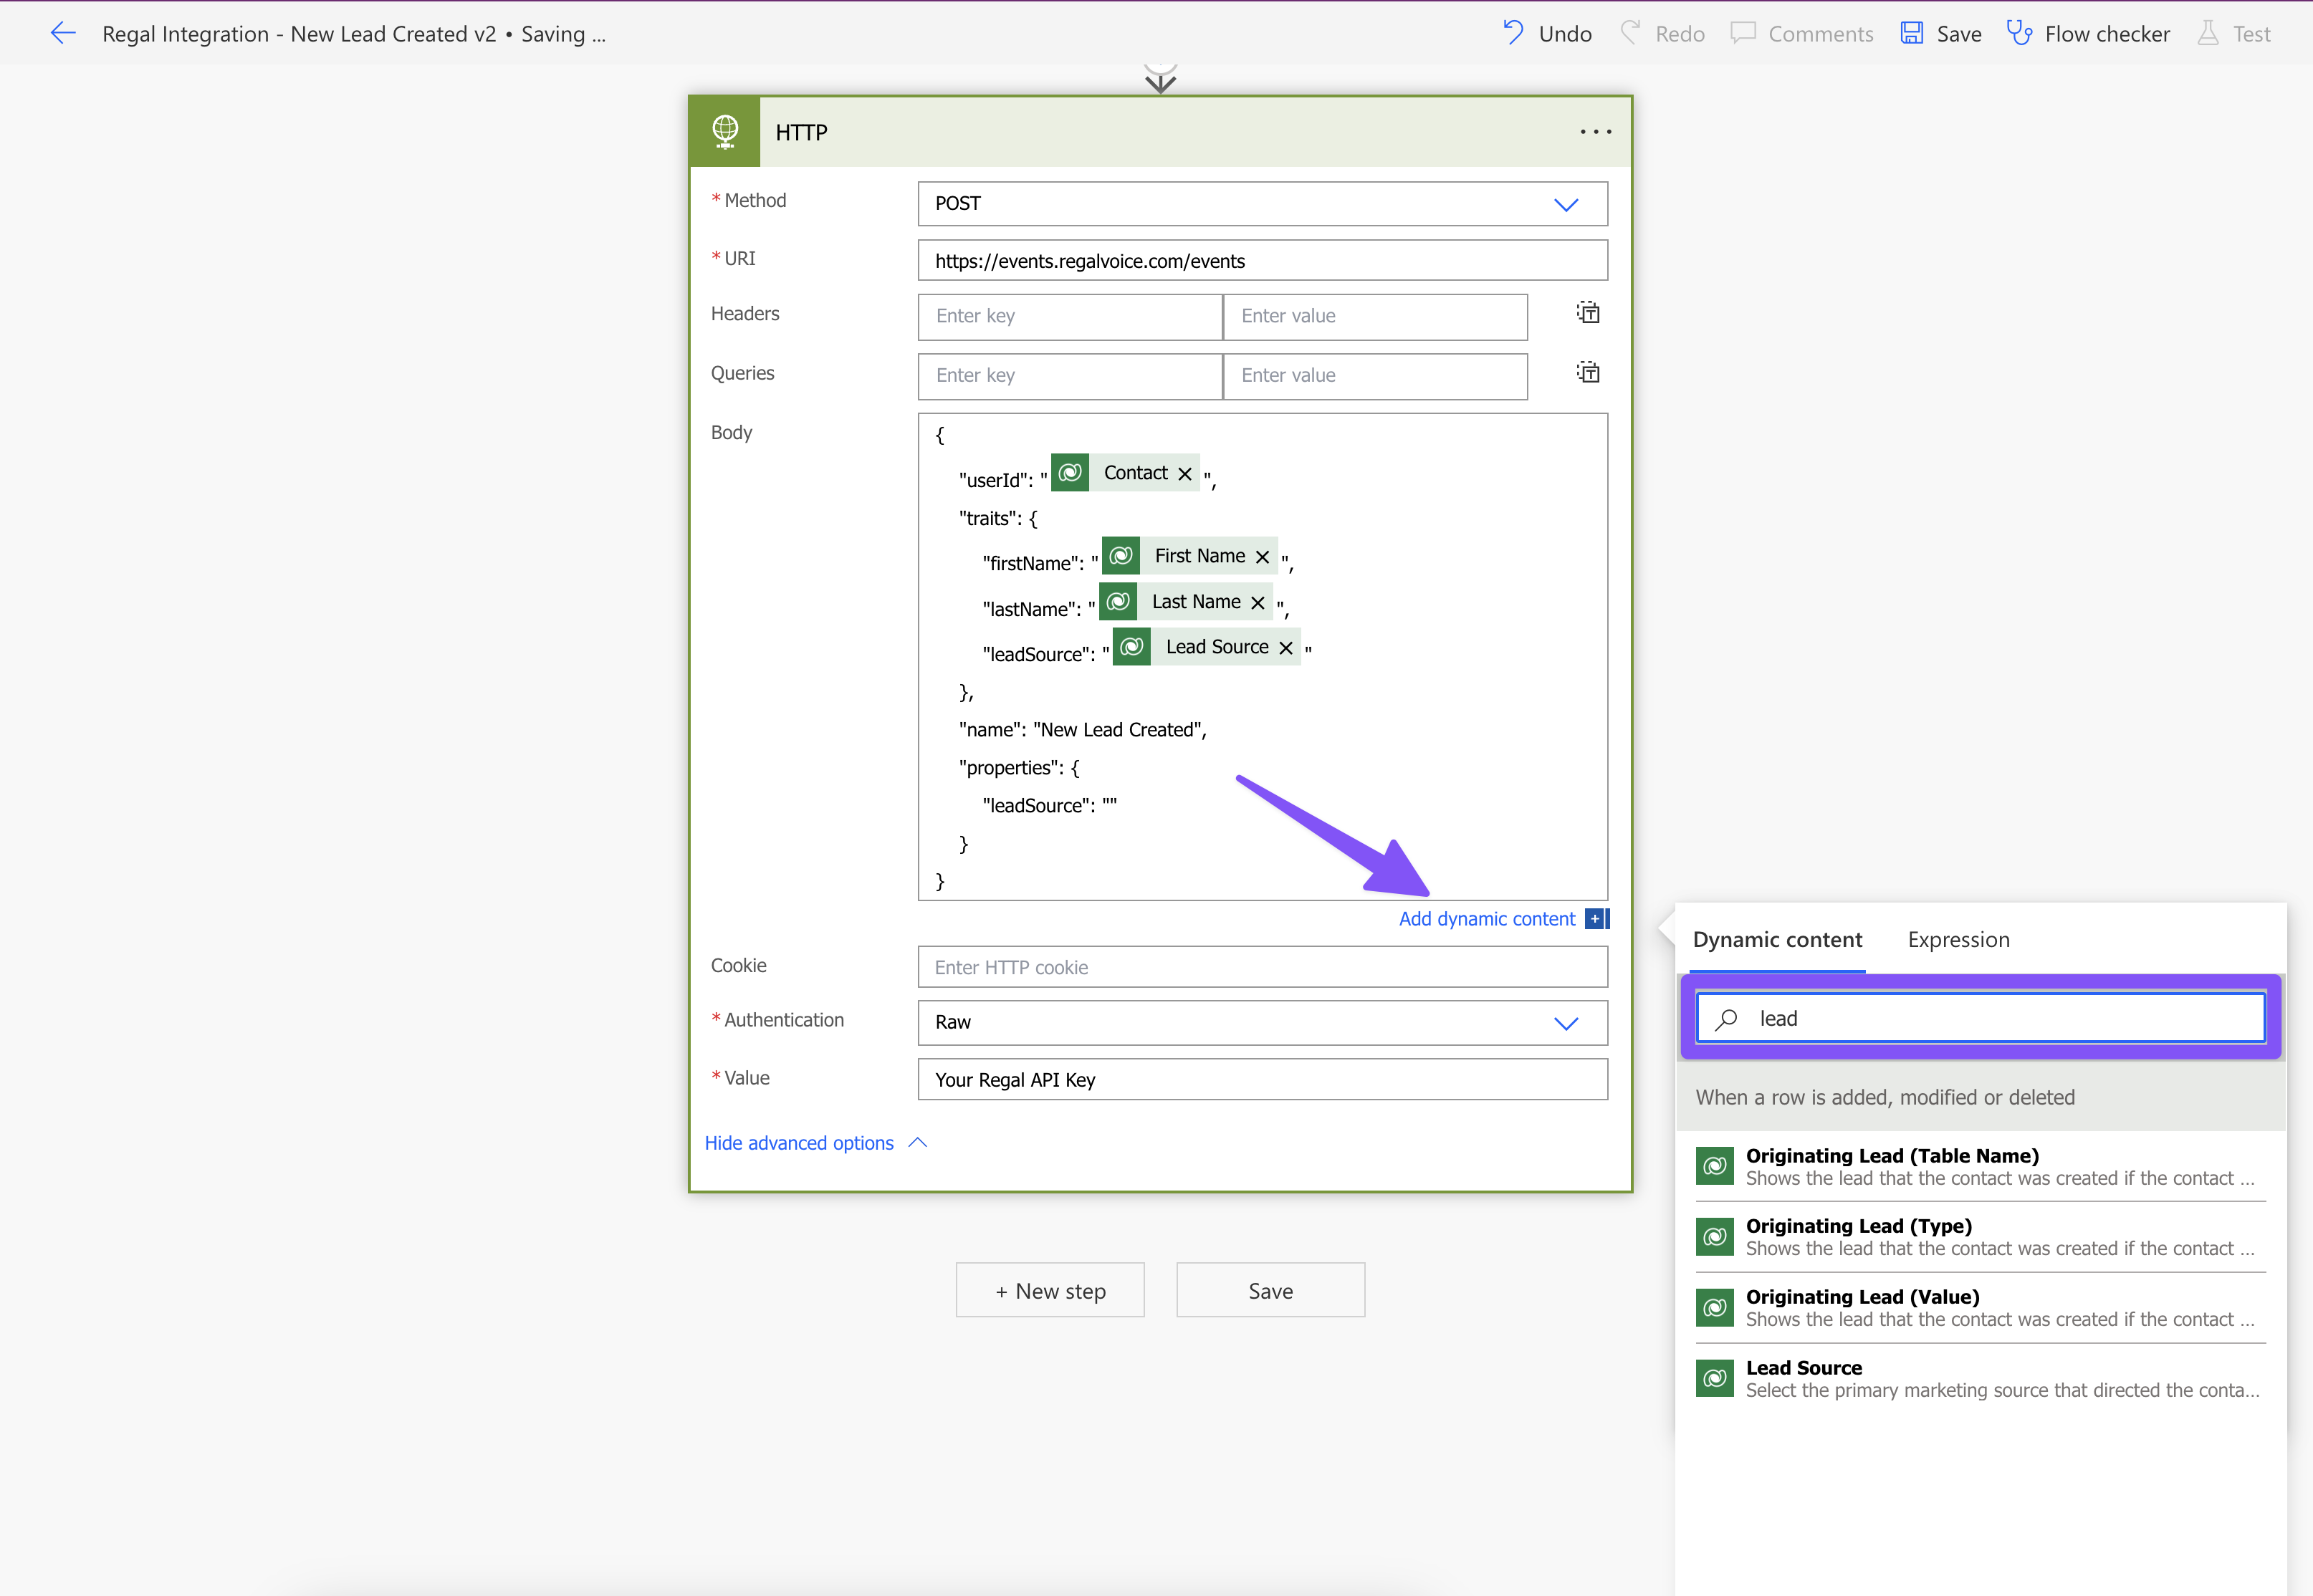
Fill in the below fields:
- Method: POST
- URI:
https://events.regalvoice.com/events - Body: JSON of event you want to fire to Regal's Events API
- If you need to add in a dynamic field, click the "Add dynamic content" button in the bottom right of the Body box
- To find out more information about Regal Event API refer to our developer docs
- Example Payload can be found below
- Select "Show advanced options" to expand the selection box
- Authentication: Raw
- Value: Your Regal API key (If you need your API email [email protected] or contact your implementation manager)
Hit Save
3) Test Your Power App Flow
Perform the Trigger of your power app, in this example I am creating a new row in the "Contact" table, simulating a form fill submission
Once you perform the Trigger, navigate to the Flow you just created and make sure the most recent run has a Status of "Succeeded"
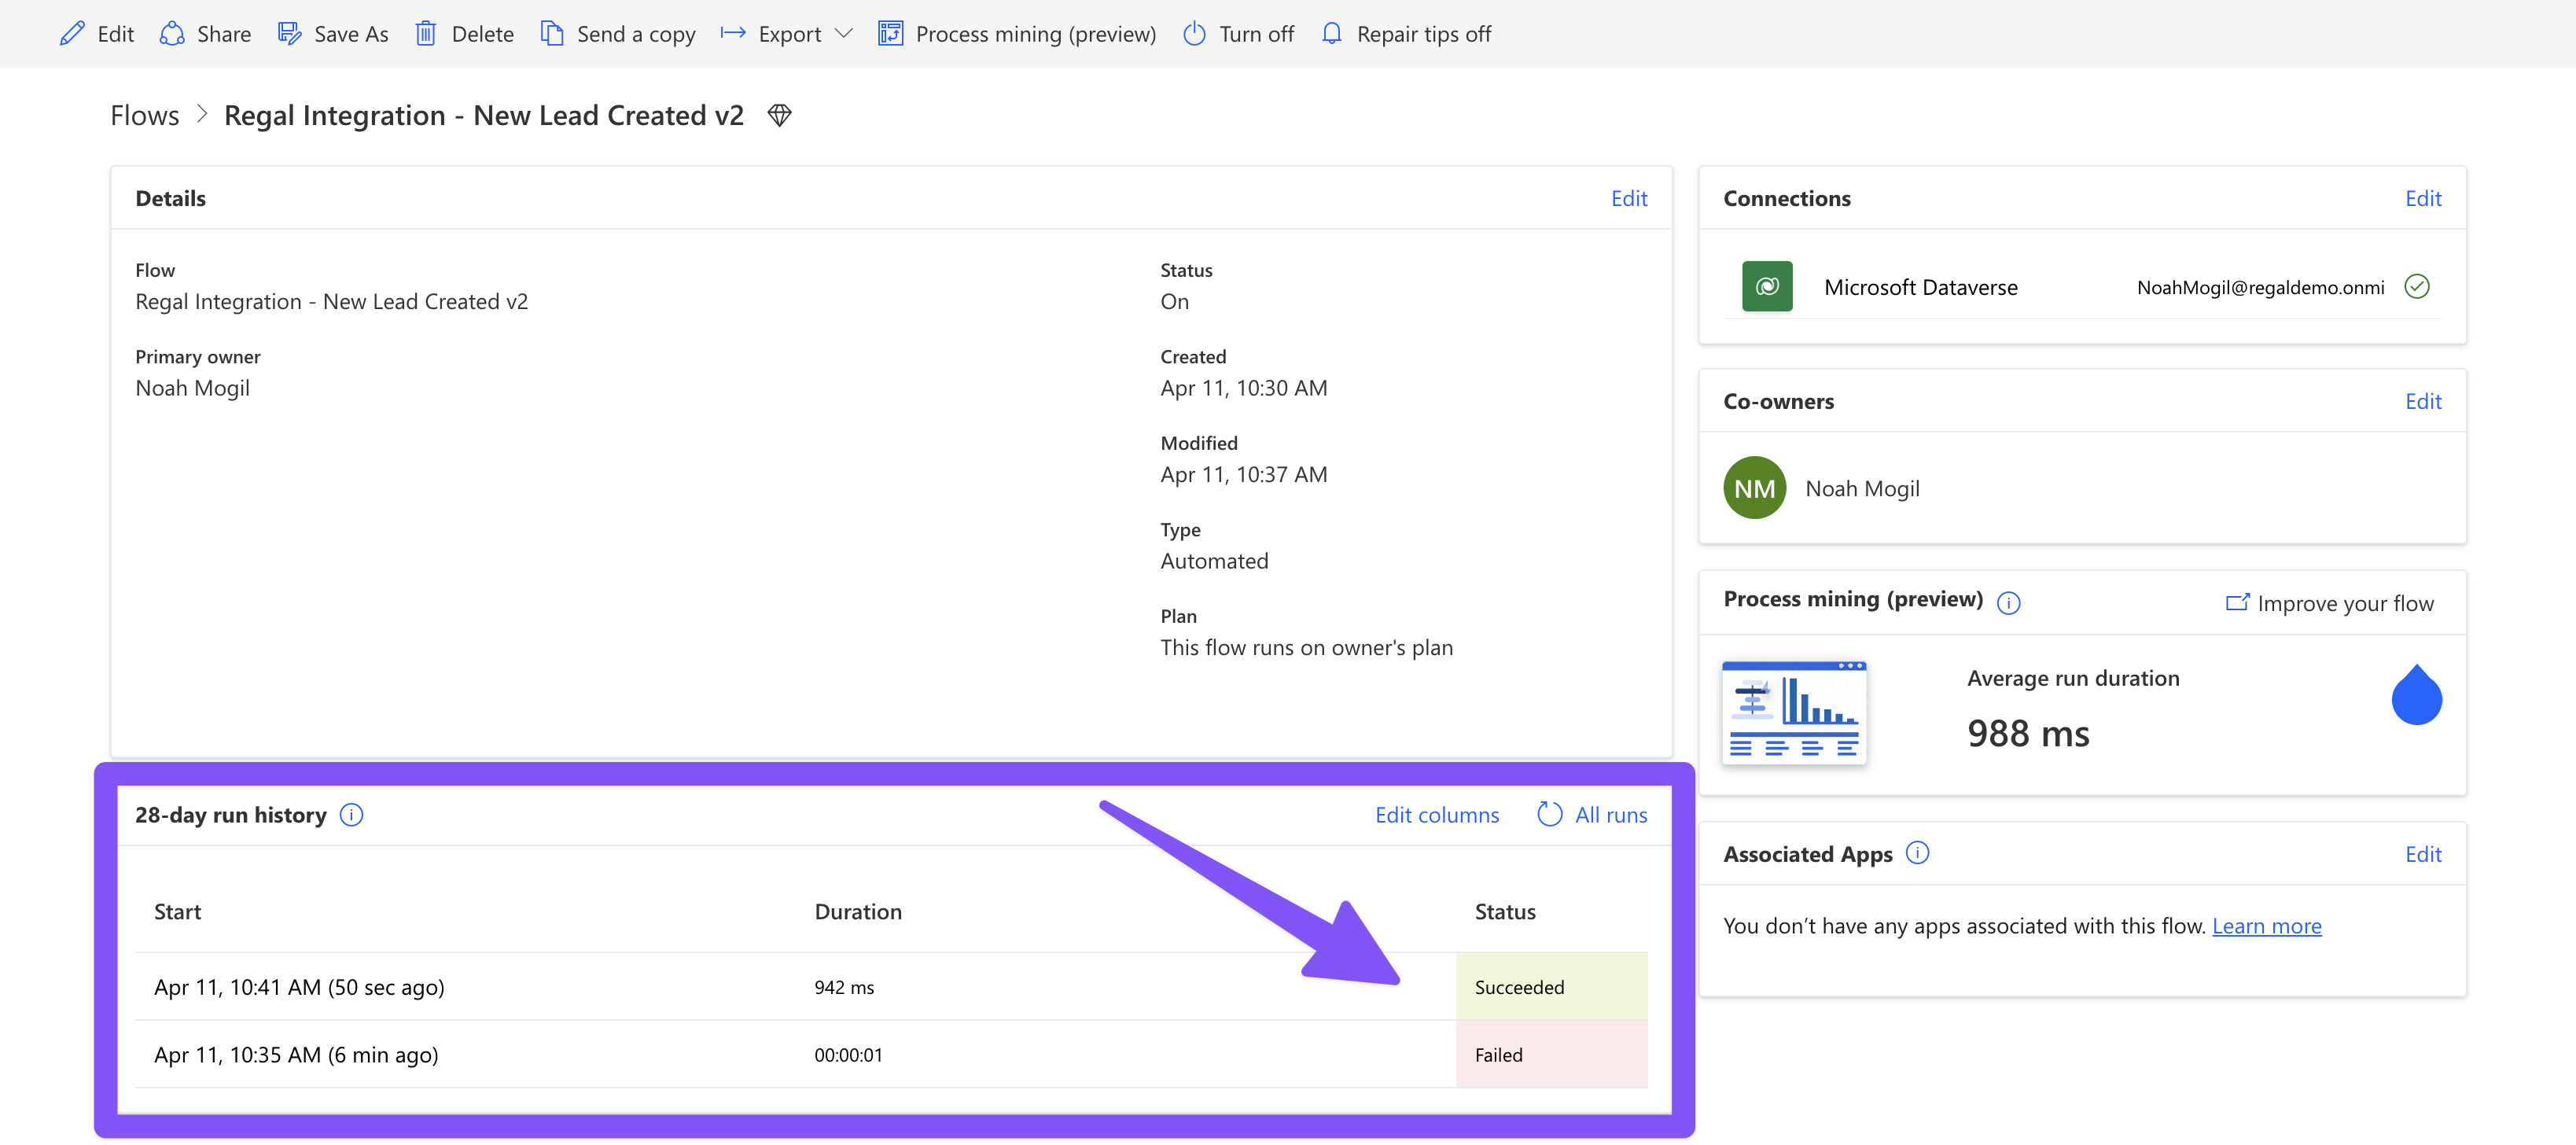
If you see Succeeded, check the Recent Activity page in Regal to confirm you see the event.
4) Payload Example
{
    "userId": "@{triggerOutputs()?['body/contactid']}",
    "traits": {
        "firstName": "@{triggerOutputs()?['body/firstname']}",
        "lastName": "@{triggerOutputs()?['body/lastname']}",
        "leadSource": "@{triggerOutputs()?['body/leadsourcecode']}",
        "address": {
            "street": "@{triggerOutputs()?['body/address1_line1']}",
            "state": "@{triggerOutputs()?['body/address1_stateorprovince']}",
            "city": "@{triggerOutputs()?['body/address1_city']}",
            "zipcode": "@{triggerOutputs()?['body/address1_postalcode']}"
        },
        "emails": {
            "@{triggerOutputs()?['body/emailaddress1']}": {
                "emailOptIn": {
                    "subscribed": true
                }
            }
        },
        "phones": {
            "@{triggerOutputs()?['body/mobilephone']}": {
                "isPrimary": true,
                "label": "Main Phone",
                "voiceOptIn": {
                    "subscribed": true
                },
                "smsOptIn": {
                    "subscribed": true
                }
            }
        }
    },
    "name": "New Lead Created",
    "properties": {
        "leadSource": "@{triggerOutputs()?['body/leadsourcecode']}"
    }
}
Updated 4 months ago