Okta SCIM
Manage Regal users from your Okta organization
This guide describes how to set up the Regal Okta app in order to enable SCIM to create, update or deprovision Regal users directly from your Okta org.
Supported Features
- Create Users: Create users in the Regal app by assigning it to them through your Okta organization.
- Update User Attributes: Update users attributes in Regal by changing them in your Okta organization.
- Deactivate Users: Remove users' Regal access by deprovisioning them from your Okta organization.
Prerequisites
You'll need a Username, and Password to complete setup. Email [email protected] to request these.
Requirements
Configure SCIM for Regal
Step 1: Click the Sign On Tab.
Step 2: Ensure that Application username format is set to Email. If it is not, click Edit, navigate to Credentials Details and select Email from the dropdown before saving.
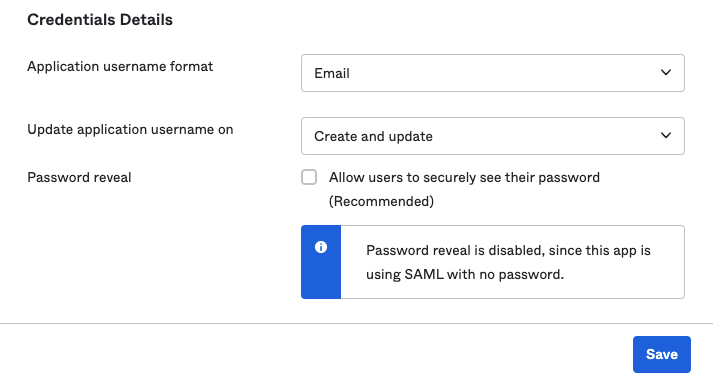
Set Application Username Format
Step 3: Click the Provisioning tab.
Step 4: Click the Configure API Integration.
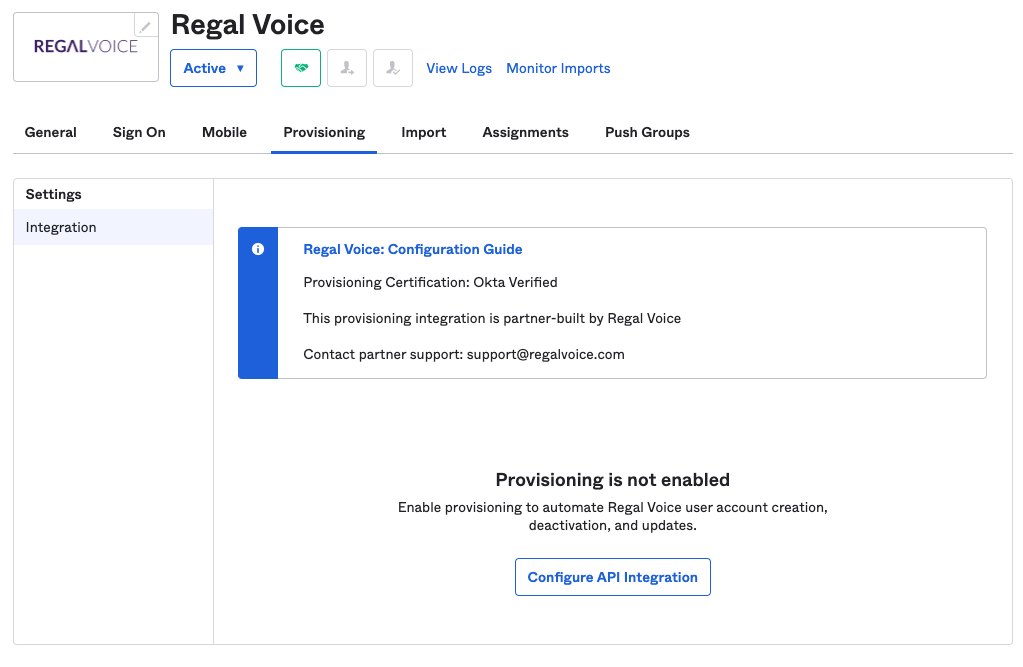
Configure App
Step 5: Check the Enable API Integration box.
Step 6: A username and password is required to set up the integration. Email [email protected] to get your username and password.
Step 7: Enter the username and password provided and click Test Connection. You will see a success message if the credentials are valid.
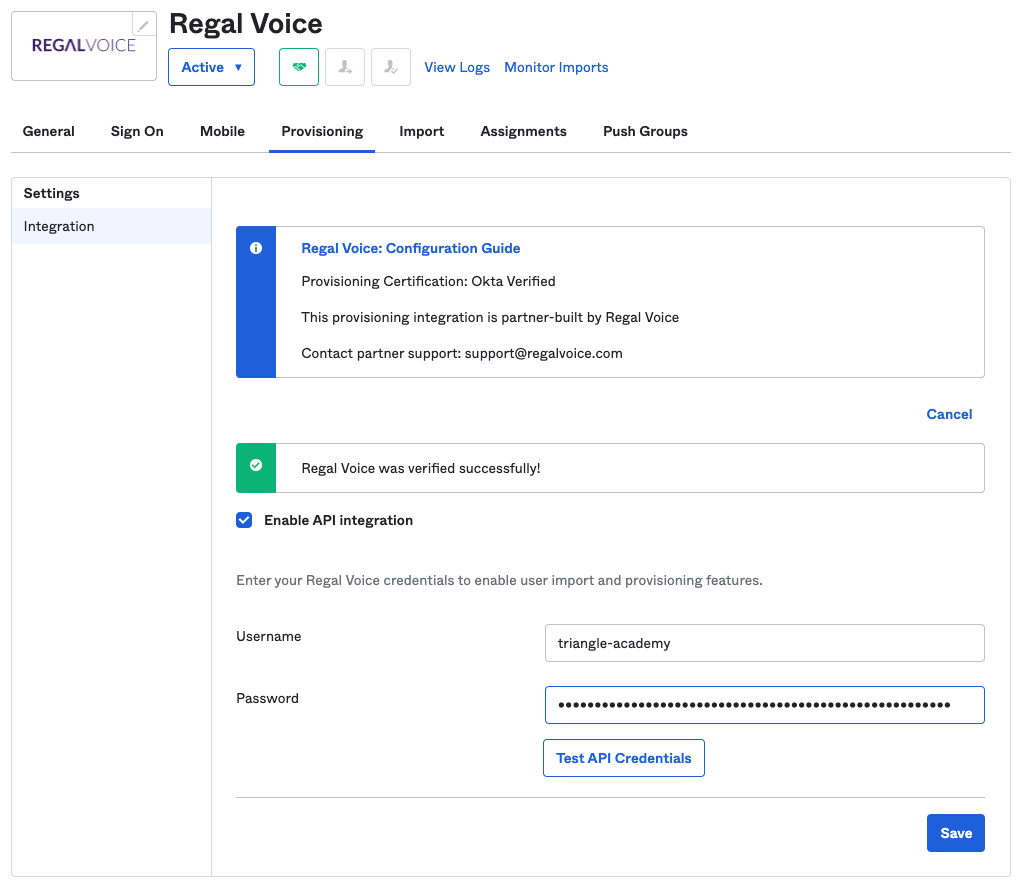
Test Connection
Step 8: After validating the connection, click Save.
Step 9: Click Edit and choose the SCIM features you would like to use. Click Save after all have been chosen.
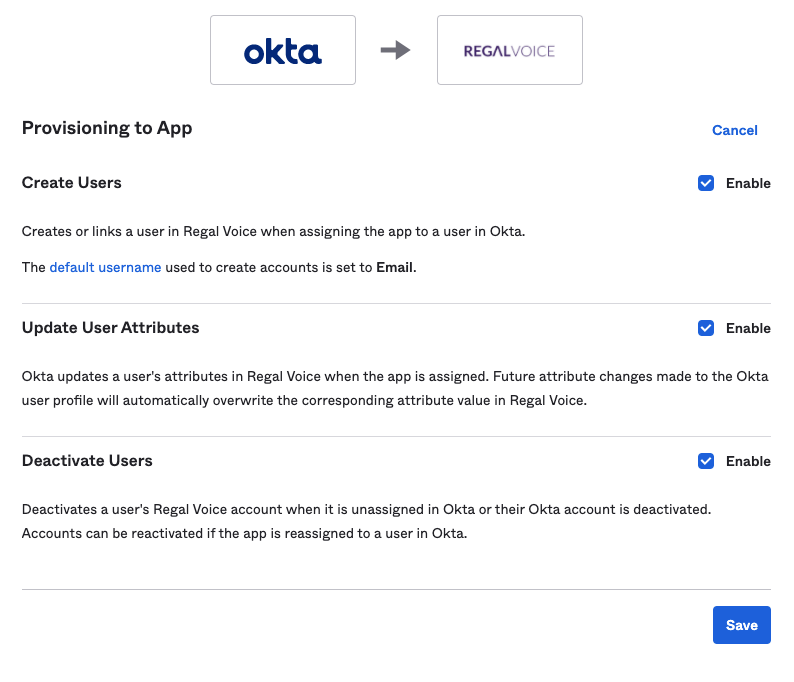
Selecting SCIM Features
There are 4 required attributes that will be mapped to Regal users created through provisioning:
- User Name (userName, which will be the email of the user)
- First Name (firstName)
- Last Name (lastName)
- Email (email)
userType is a field that is required when assigning a user or a group to the Regal app. This will not be mapped from your Okta organization. Instead, this will need done at the time of provisioning. The value can be either agent or admin depending on the role of the agent.
Assigning Regal App to Users and Groups
To assign users from your Okta organization to the Regal application:
Step 1: Navigate to Applications > Applications through the Okta sidebar when logged in to the admin dashboard.
Step 2: Click on Regal.
Step 3: Click on the Assign dropdown and choose whether you'd like to assign the application to Users or Groups.
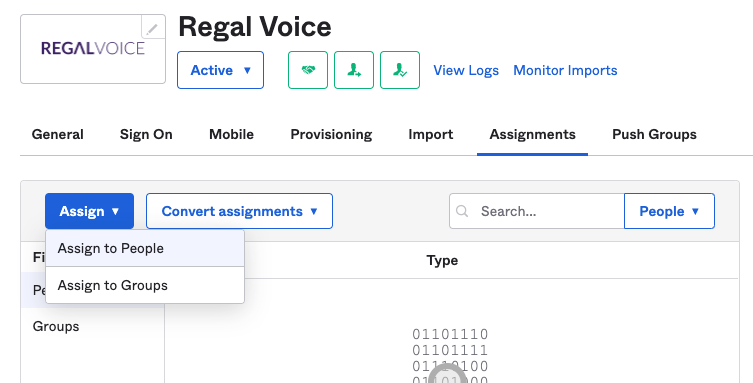
Assigning Users to the Regal App
Step 4:
If assigning to Users:
- Go through the list of Users and click Assign to the ones you'd like to add to the application.
- After clicking Assign, choose a role for the User.
- Click Save and Go Back.
- Click Done once finished to assign the chosen users to the Regal app.
If assigning to Groups:
- Go through the list of Groups and click Assign to the ones you'd like to add to the application.
- After clicking Assign, choose a role for the Group.
- Click Save and Go Back.
- Click Done once finished to assign the chosen Groups to the Regal app.
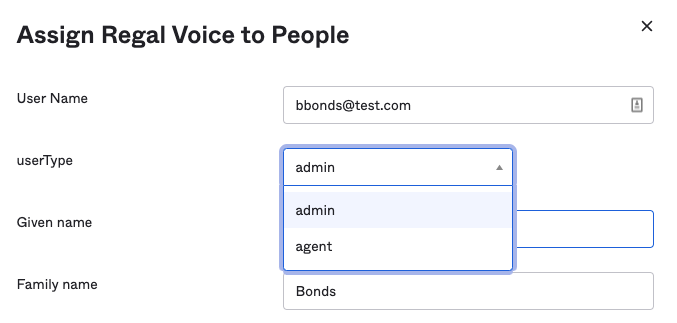
Selecting a userType for Provisioned Users.
Once finished, users will be able to log into Regal through their Okta dashboard.
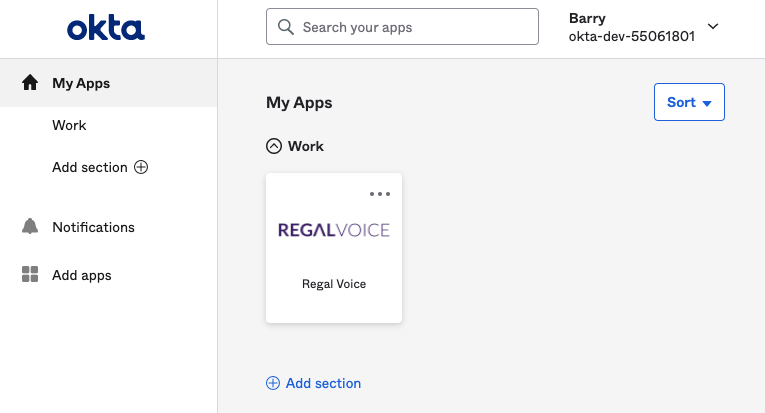
Regal as displayed on the End User Dashboard
Deprovisioning Users from Regal
To remove a Okta user's access to Regal:
Step 1: Navigate to Applications > Applications through the Okta sidebar when logged in to the admin dashboard.
Step 2: Click on Regal.
Step 3: Choose either Users or Groups from the left menu.
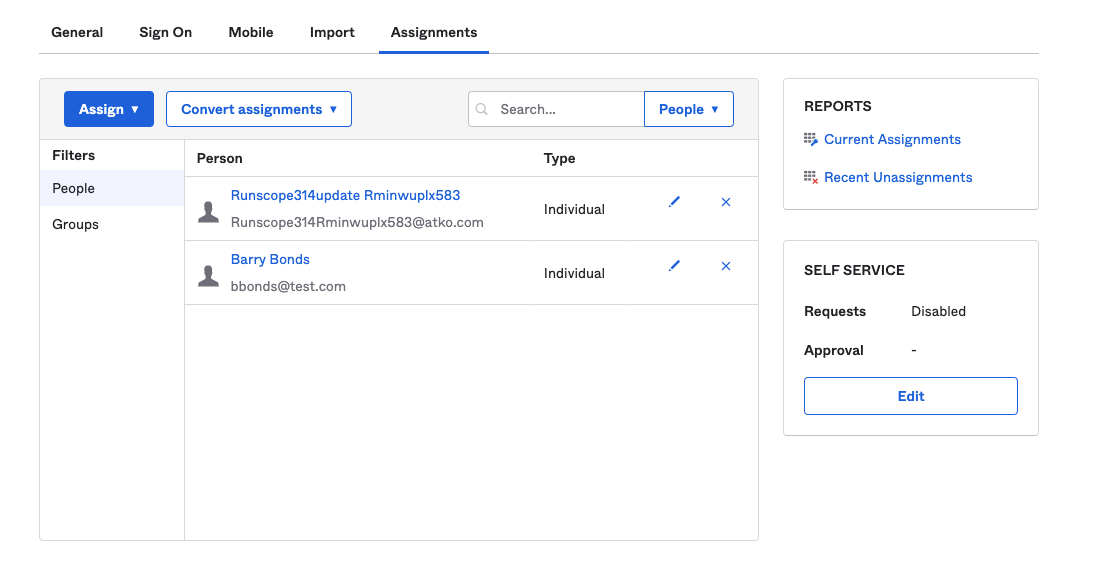
Current Regal Assignments
Step 4: Click the x next to the User or Group you want to remove Regal access from.
Step 5: Click Ok on the unassign confirmation dialog.
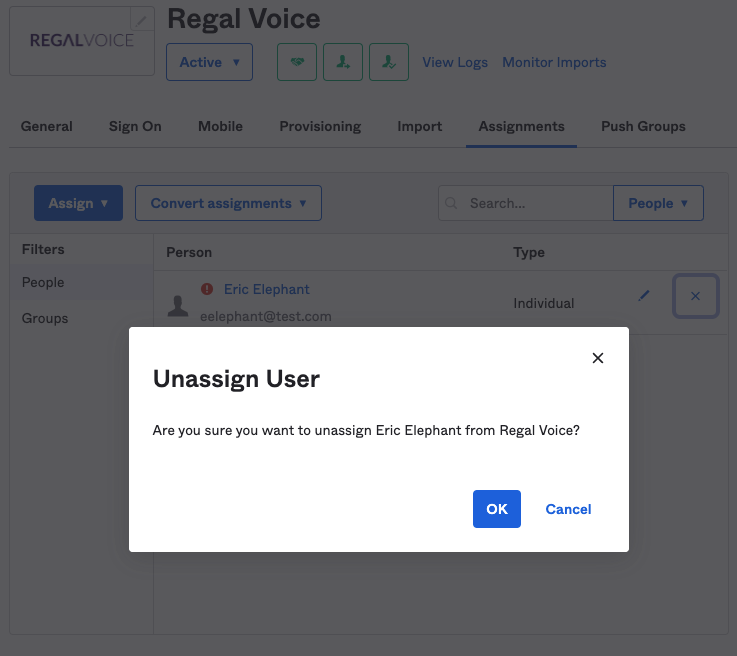
Confirm User Unassignment
The user or group has now been unassigned from Regal. They will no longer see it on their Okta dashboard or be able to log in to Regal.
Known Issues/Troubleshooting
If you have any issues setting up Okta, please email [email protected].
Updated almost 2 years ago
